- 23 Aug, 2026
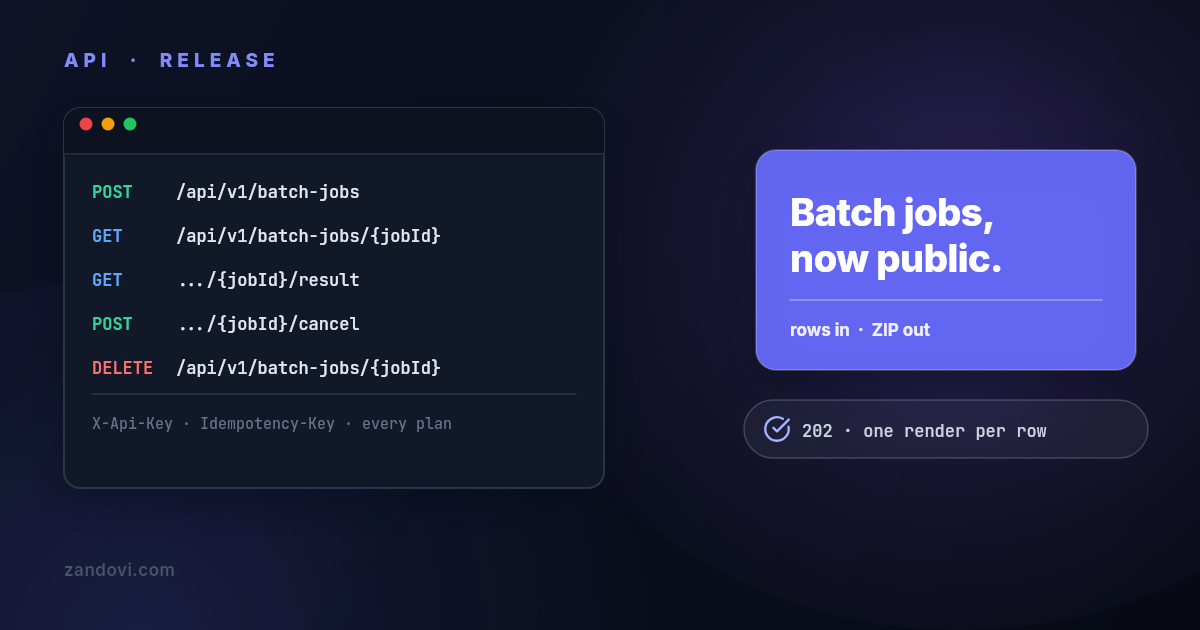
Batch Jobs Are Now in the Public API
Until this week, batch generation was an app feature. You could upload a CSV in the editor and download a ZIP, but from code the only way to render two hundred images was two hundred POST requests. Our own docs told you to loop the generate endpoint. Several of our own guides taught the workarounds: guard your retries, watch the rate limit, keep your own bookkeeping. That's over. Batch jobs are now a first-class resource in the public API, on every plan, with the same API key you already have: POST /api/v1/batch-jobs submit rows, get a job back GET /api/v1/batch-jobs list your jobs GET /api/v1/batch-jobs/{jobId} poll status and progress GET /api/v1/batch-jobs/{jobId}/items what each submitted row produced GET /api/v1/batch-jobs/{jobId}/result download URL or ZIP stream POST /api/v1/batch-jobs/{jobId}/cancel stop it, refund what didn't render DELETE /api/v1/batch-jobs/{jobId} remove a finished job and its archiveOne submission carries one template and up to 400 rows, each row becomes one image, and the job hands back a ZIP. The tutorial post walks the flow end to end with code; this note is about the decisions behind it, because a few of them are the reason to use it over the loop you already have. Retries can't double-bill you Bulk submissions are exactly the requests that get retried: they're big, they sit on the wire longer, and they run from job queues that re-execute on timeout. So the submit endpoint takes an Idempotency-Key header. Retry with the same key and you get the original job back instead of a duplicate, and your quota doesn't move. The implementation detail worth trusting: deduplication is a unique index in the database, not an application-level check. Two concurrent retries of the same submission race all the way to the insert, the database picks one winner, and the loser returns the winner's job and refunds itself. There is no window where both retries create a job. Reusing a key for a different submission fails loudly with a 409 instead of returning something that isn't what you sent. One key, one batch. Validation runs before billing Every row is validated against the template's variable rules at submission time. One bad row rejects the whole submission with a 400 that names it, no job is created, and no quota is charged. The failure mode where a job dies at row 217 and you reconstruct what rendered from your logs is not a failure mode this API has. Cancel refunds exactly what didn't render A job with N rows charges N renders up front, which keeps quota accounting simple and predictable. The other half of that promise is the cancel endpoint: stop an active job and every render that hadn't completed comes back, totalItems minus completedItems. The arithmetic runs on a conditional update inside the database, so a cancel that loses a race against the job's completion refunds nothing rather than refunding work you actually received. Cancelling a finished job is a harmless no-op. Deleting never refunds; cancelling is what settles the bill. The ZIP can't silently lose your files Filename patterns let you name output files from your data, "filenamePattern": "{voucher_code}", instead of image-000.png. Which raises a question nobody wants answered in production: what happens when two rows produce the same name? They get suffixed, ticket.png, ticket-2.png, case-insensitively, after the names are scrubbed of everything a filesystem might object to, including Windows-reserved names and path tricks. The invariant is blunt: a collision, an accented name, or a hostile value in a data column can rename a file but never drop one. The archive is flat — images only, no folder, no manifest — and a row that failed to render simply isn't in it. That's what /items is for: every submitted row in submission order, with the filename it produced, its size, and the error if it has one. Row-level bookkeeping reads without downloading anything, and it stays readable long after the archive itself has aged out. Job history survives key rotation Jobs belong to the account that created them, not to the API key. Rotate a key, and the replacement sees, polls, and downloads every job the old key created. Rotating credentials is something you should be able to do casually; losing your job history was a bad reason not to. Polling that isn't punished Submission is rate-limited to 1 per second. Status and result reads run at 100 per second, a separate tier, so a fleet of workers each polling their job every two seconds doesn't compete with, or get mistaken for, submission traffic. Poll freely; that's what the tier is for. Or don't poll at all A submission can carry a callbackUrl, and when the job reaches a terminal state we POST a summary to it — job id, terminal status, final counters — so an automation can submit and go quiet instead of holding a loop open for the length of the render. All three terminal states are delivered. Someone who stopped polling because a callback was promised has to hear about a failure and a cancellation too, not only a success. Two decisions in there are worth stating plainly. The payload carries no download URL: result links live an hour, and a delivery retried ninety minutes later would arrive holding a dead one, so you ask for a fresh link when your handler is ready to collect. And every delivery is signed — X-Zandovi-Signature, HMAC-SHA256 over the timestamp and the raw body, keyed by a per-organization secret that is deliberately not your API key. A leaked API key can't forge callbacks; a leaked signing secret can't render anything. Delivery is at-least-once with a deliveryId that's stable across retries, so deduplicate on it. Retries are bounded — five attempts over roughly fifteen minutes, which outlives a rolling deploy but refuses to become a permanent queue pointed at a dead URL. Because they're bounded, whether a delivery ever landed is readable on the job itself as completionCallback, with the attempt count and the last error. Without that, an endpoint that refused every attempt would look exactly like a job that never finished. There is no subscription API behind this, no event catalogue, and no endpoint registry to keep in sync. The URL belongs to the submission that wants to hear back. What's not in v1 One template per job; rows vary the data, not the design. Row caps are per plan, 25 on Free up to 400 on Business, and two jobs can be active at once. Result archives are kept for 30 days after a job finishes, after which the download reports itself expired rather than missing — the job, its counters and its per-row outcomes stay readable. If any of those are the thing between you and using it, tell us. If you're currently looping Keep the loop for event-driven single images; that shape is still right. For everything that renders a set, the migration is mechanical: the variables object you send per request becomes one entry in rows, the render options move up a level onto the job, and the response handling collapses into poll-then-download. # before: 400 requests, your retry logic, your rate limiting, your ZIP # after: curl -X POST https://app.zandovi.com/api/v1/batch-jobs \ -H "X-Api-Key: $ZANDOVI_API_KEY" \ -H "Content-Type: application/json" \ -H "Idempotency-Key: badge-run-2026-08-22" \ -d '{ "template": { "templateId": "'$TEMPLATE_ID'", "format": "png" }, "rows": '"$(cat rows.json)"' }'The CSV tab in the app isn't going anywhere; it's the same engine with a spreadsheet in front of it, and the when-to-use-which question has the same answer as before: humans upload files, backends POST rows.Full reference, including every error code and limit: Batch Rendering in the docs. The OpenAPI spec already includes the seven new operations if you'd rather import them into Postman. Callbacks have their own page: Completion Callbacks.
- 22 Aug, 2026
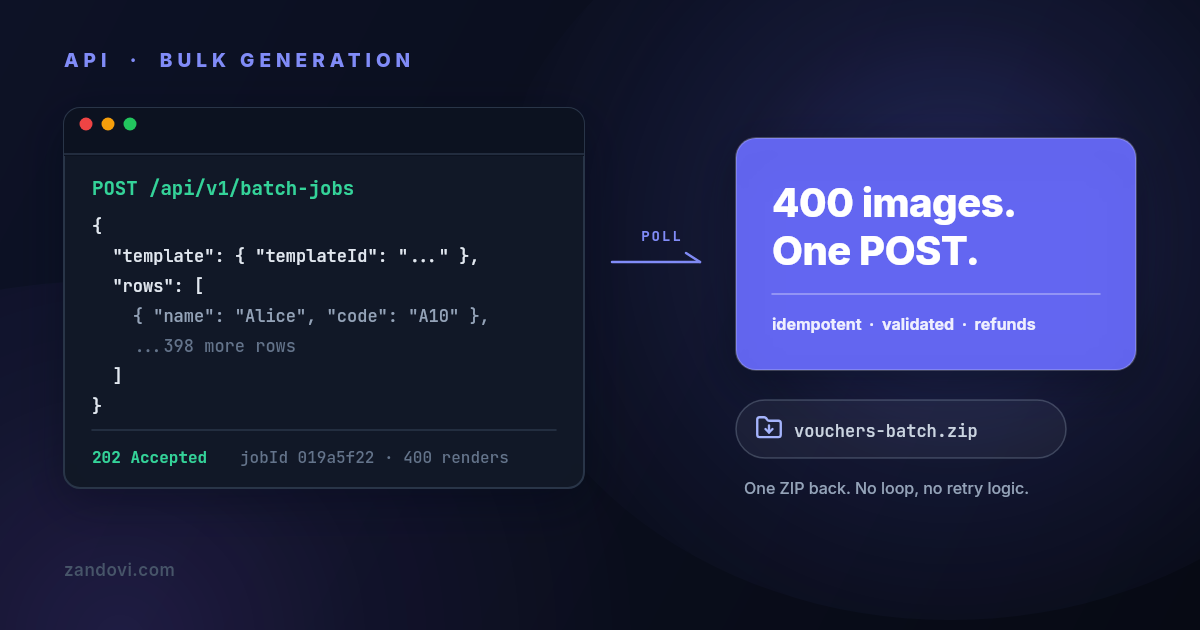
Bulk Image Generation Without the Loop: One POST, One ZIP
You have a template and a few hundred rows of data. A voucher per customer, a badge per attendee, that kind of job. The obvious move is a for loop around a render endpoint, and the obvious move works right up until it doesn't. The loop hits the per-second rate limit, so you add a sleep. Some requests time out, so you add retries. A retry lands on a request that actually succeeded, so now you've paid for the same image twice and you add your own deduplication layer. Request 217 of 400 fails on a bad row, so you write bookkeeping to know where to resume. Then you collect 400 responses into files, name them, and zip them yourself. None of that is image generation. All of it is your code now. Zandovi's batch endpoint exists so you don't write any of it. You POST the rows once, the service renders them all, and you download a single ZIP. This post walks through the whole flow and the details that make it safe to call from automation: idempotent retries, validation before billing, and refunds when you cancel. The shape of a batch job Three requests, start to finish:POST /api/v1/batch-jobs with a template ID and a rows array. You get 202 Accepted and a job ID back immediately. GET /api/v1/batch-jobs/{jobId} until the status turns COMPLETED. GET /api/v1/batch-jobs/{jobId}/result for a download URL, or the ZIP bytes directly.Each row is one rendered image, and each row costs one render from your monthly quota, the same as one call to the single-render endpoint. A 400-row job is 400 renders, charged when the job is accepted. Submitting the job Every row is an object mapping variable names to values, exactly the shape the single-render endpoint takes in variables. Format and render options are set once, on the job, because rows differ only in data: curl -X POST https://app.zandovi.com/api/v1/batch-jobs \ -H "X-Api-Key: $ZANDOVI_API_KEY" \ -H "Content-Type: application/json" \ -H "Idempotency-Key: spring-vouchers-2026" \ -d '{ "template": { "templateId": "019463b8-1234-7890-abcd-ef1234567890", "format": "png", "options": { "scale": 2 }, "output": { "filenamePattern": "{voucher_code}" } }, "rows": [ { "first_name": "Alice", "voucher_code": "ALICE10" }, { "first_name": "Bob", "voucher_code": "BOB20" } ] }'{ "jobId": "019a5f22-4c1e-7d90-b3a8-6f2e91c04d77", "status": "PENDING", "totalItems": 2, "createdAt": "2026-08-11T10:00:00Z" }The detail that does the most work here: validation runs before billing. Every row is checked against the template's variable rules at submission. If row 217 is missing a required value or carries barcode data that won't encode, the whole submission is rejected with a 400 naming the row, no job is created, and nothing is charged. You fix the row and resubmit. The half-finished batch, the one where you're not sure which rows rendered before it died, doesn't exist in this flow. Polling until it's done curl https://app.zandovi.com/api/v1/batch-jobs/$JOB_ID \ -H "X-Api-Key: $ZANDOVI_API_KEY"The status response carries totalItems, completedItems, failedItems, and an errors array with per-row messages, so a progress bar is free. Statuses run PENDING, PROCESSING, and then one of COMPLETED, FAILED, or CANCELLED. The inline errors array is capped at the first five failures — failedItems carries the true count, and GET /batch-jobs/{jobId}/items carries the whole list, one entry per submitted row with its filename, size and error. Status reads sit in a separate, much higher rate tier than submissions (100 per second versus 1 per second), so polling every couple of seconds is fine. In Node, the whole flow is about twenty lines: const BASE = "https://app.zandovi.com/api/v1"; const headers = { "X-Api-Key": process.env.ZANDOVI_API_KEY!, "Content-Type": "application/json", };async function renderBatch(templateId: string, rows: Record<string, string>[]) { const submit = await fetch(`${BASE}/batch-jobs`, { method: "POST", headers: { ...headers, "Idempotency-Key": `batch-${templateId}-${rows.length}` }, body: JSON.stringify({ template: { templateId, format: "png" }, rows }), }); const { jobId } = await submit.json(); while (true) { await new Promise((r) => setTimeout(r, 2000)); const job = await (await fetch(`${BASE}/batch-jobs/${jobId}`, { headers })).json(); if (job.status === "COMPLETED") break; if (job.status === "FAILED" || job.status === "CANCELLED") throw new Error(`Batch ${job.status}: ${JSON.stringify(job.errors)}`); } const result = await ( await fetch(`${BASE}/batch-jobs/${jobId}/result`, { headers }) ).json(); return result.downloadUrl; // valid for 1 hour; fetch again for a fresh one }One wrinkle worth knowing: calling the result endpoint before the job finishes returns 409 with code: BATCH_RESULT_NOT_READY, deliberately distinct from 404. Your code can tell "keep waiting" from "this job is gone" without guessing. Or let the job call you The loop above is fine for a script you're watching. For anything that runs unattended, hand the submission a callbackUrl and skip the waiting entirely: await fetch(`${BASE}/batch-jobs`, { method: "POST", headers: { ...headers, "Idempotency-Key": `batch-${templateId}-${rows.length}` }, body: JSON.stringify({ template: { templateId, format: "png" }, rows, callbackUrl: "https://example.com/hooks/zandovi", }), });When the job reaches COMPLETED, FAILED or CANCELLED, Zandovi POSTs a summary to that URL — deliveryId, jobId, status and the final counters. No download URL is in the body on purpose: result links expire after an hour and a retried delivery would arrive carrying a dead one, so your handler calls the result endpoint for a fresh link when it's actually ready to collect. Verify the delivery before you act on it. Each one carries X-Zandovi-Signature: t=<unix-seconds>,v1=<hex>, where the hex is HMAC-SHA256(secret, t + "." + rawBody). The secret is per organization, lives in the app under Settings → API Keys, and is not your API key. Three things break verification quietly: re-serializing the body before hashing it (read the raw bytes), comparing with === instead of a constant-time compare, and accepting stale timestamps. Delivery is at-least-once with five attempts over roughly fifteen minutes, so deduplicate on deliveryId and return 2xx as soon as you've durably accepted the payload — a handler that renders or emails inline will hit the ten-second timeout and be retried even though it worked. If a delivery gives up, the job says so: GET /batch-jobs/{jobId} carries a completionCallback object with the attempt count and the last error. Worth checking, because bounded retries mean an endpoint that refused every attempt otherwise looks identical to a job that never finished. The full rules are in Completion Callbacks. The retry that doesn't cost you twice The single-render endpoint has no server-side deduplication. Call it twice and you pay twice, which is why the automation platform guide spends three paragraphs on guarding your own retries. Batch submissions fix this properly. Send any string in the Idempotency-Key header, and a retry of the same submission with the same key returns the original job: the same jobId comes back, and nothing renders or bills twice. This holds even when two retries race each other, because the deduplication is enforced by a unique index in the database rather than by application code checking first and inserting second. Two rules keep it honest. One key belongs to one submission, so reusing a key with a different template, row count, format, or filename pattern is rejected with 409 BATCH_IDEMPOTENCY_KEY_REUSED instead of silently returning the wrong job. And the comparison is structural: the server matches the submission's shape, not every row byte, so don't recycle yesterday's key for today's data. Derive the key from the thing the batch represents, like payroll-aug-2026 or an order ID, and reuse it only when retrying that exact batch. If your code has any retry path at all, and it does, send the header. Files named from your data By default the ZIP contains image-000.png, image-001.png, and so on, which is fine until you need to match file 217 to a person. Set a filename pattern instead: "output": { "filenamePattern": "{voucher_code}" }Any row variable works as a placeholder, plus {index}, {timestamp}, and {random}. Values are lowercased and unsafe characters become hyphens. Skip the extension; the format's own extension is appended, so {voucher_code}.png would come out as alice10.png.png. If two rows produce the same filename, the later ones get a suffix, ticket.png then ticket-2.png. That rule sounds minor and isn't: it means an archive can never silently contain fewer files than the rows you paid for. Cancelling, and what it refunds POST /api/v1/batch-jobs/{jobId}/cancel stops an active job and refunds every render that hadn't completed, totalItems minus completedItems, back to your quota. Submit 400 rows, cancel at 150 done, get 250 renders back. Cancelling a job that already finished is a no-op that refunds nothing, and the accounting is race-safe: a cancel that arrives just as the job completes doesn't refund work that was actually delivered. Deleting is separate. DELETE removes a finished job and its archive but never refunds; cancellation is the operation that settles the bill. When the loop is still right A batch job is for many images from one template, now. It's the wrong shape for one image per event: a voucher the moment someone signs up, an OG image when a post publishes, a ticket when someone pays. Those want the single-render endpoint called from the event, one POST, bytes back. The OG image guide and the spreadsheet-to-API section of the certificates guide cover that shape. The dividing line: if you'd be writing a loop, it should be a batch job. If there's no loop, it shouldn't be. What this doesn't do One template per job. Rows vary the data, not the design. Rendering three different templates is three jobs. Row caps are per plan: 25 rows per job on Free, 100 on Personal, 200 on Studio, 300 on Team, 400 on Business. Bigger datasets get split into multiple jobs, and you can have two active jobs at a time. The result URL expires after an hour. That's a fresh-URL-on-request design, not image hosting; ask again for another one. The archive behind it is kept for 30 days after the job finishes, then deleted — the download answers 410 BATCH_RESULT_EXPIRED rather than a bare 404, and the job's counters and per-row outcomes stay readable indefinitely. Copy the ZIP into your own storage if you need it longer. If you need individually hosted images rather than a ZIP, that's what share links are for. What this costs One render per row, from the same monthly pool as every other render. The free plan's 100 renders cover a real test batch of 25 rows four times over. Personal at $29/month is 5,000 renders with 100-row jobs, and the caps rise from there. Cancelled rows come back; the quota only keeps what was actually rendered.The batch rendering reference documents all seven endpoints, every error code, and the full filename pattern rules, and Completion Callbacks covers signing and retries. For why the API is shaped this way, see the launch note.
- 21 Aug, 2026
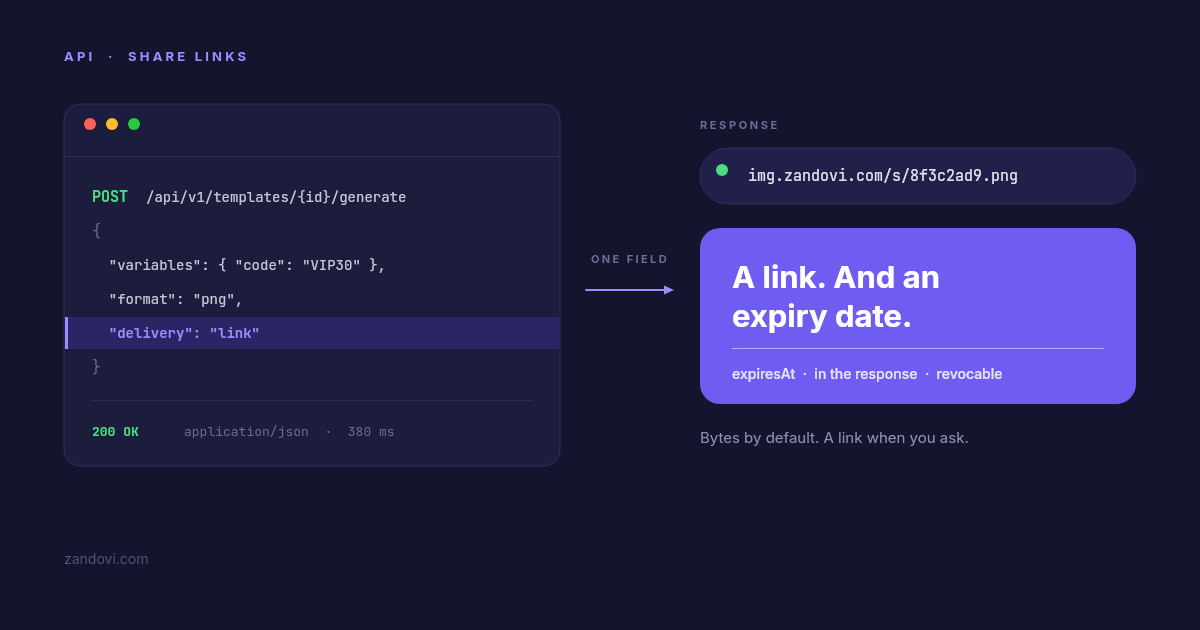
Your Render Came Back as a URL. How Long Does It Last?
You POST a JSON payload to an image API. A second later you get back something like this: { "image_url": "https://cdn.example.com/renders/8f3c2ad9.png" }That's convenient. It's also the end of what most vendors will tell you. The image is now sitting on somebody else's storage, behind somebody else's CDN, under a retention policy you have probably not read, and you are about to paste that URL into an email that goes to fifty thousand people. We build one of the products in this category, so read this with that in mind. What follows is a check we did on ourselves and then on everyone else, in August 2026, working from each vendor's own API documentation. First, the thing we got wrong We had an internal note claiming hosted URLs were a premium feature in this category — something you unlock on a higher plan. We were about to publish that. It isn't true. Of ten vendors we checked, eight return a hosted URL as their default or only response format, and six of those offer it on a free or entry tier with no gate at all. If you're using a rendering API today, you are almost certainly already getting a URL. What is commonly gated to higher tiers is bring-your-own-storage — pointing the renderer at your own S3 bucket instead of theirs. Bannerbear puts it on Enterprise, APITemplate.io on Enterprise, Templated on Scale, Bannerify on Business, Switchboard on Agency. That's a real pattern. It just isn't the same thing as "hosted URLs are premium," and we shouldn't have conflated them. So this post isn't "here's a feature nobody else has." It's the more useful version: here's what to actually check about the URL you're already getting. Question 1: how long does it live? This is the one that surprised us, and it's the reason the post exists. Retention policy is where the documentation in this category thins out fast. Some vendors state a policy clearly:APITemplate.io — one year on the free plan, indefinite on paid while your subscription is active. HTML/CSS to Image — kept as long as your account is active. RenderForm — 14 days on free and pay-as-you-go, persistent on Pro. Switchboard — a flat seven days, on every plan.Others are vague or silent. Bannerbear's duration wasn't something we could pin down from the docs. Placid says images are kept for a limited time without committing to a number. Templated and Abyssale don't appear to state it at all. Note the spread: seven days at one vendor, indefinite at another. Both are defensible policies, and they imply completely different architectures on your side. If you assumed "indefinite" and you're on the seven-day one, your emails develop broken images a week after send, and nothing in your monitoring will tell you. (We keep a running comparison of this category's pricing in What a Rendered Image Actually Costs — retention is the sort of thing that belongs on a pricing page and almost never is.) Zandovi expires links on a plan-based schedule — seven days on free, thirty on Personal, up to a hundred and eighty on Business — and the exact timestamp comes back in the response: { "url": "https://img.zandovi.com/s/8f3c2ad9e1b74c05.png", "expiresAt": "2026-09-23T09:00:00Z" }We'll be direct about the trade here: that's shorter than several competitors. If you want an image to live indefinitely, APITemplate and HCTI will do that and we won't. What we'll do instead is tell you the exact moment it stops, in the response body, so you can store it next to whatever references the URL. Which of those you want depends entirely on the next question. Question 2: is this image supposed to outlive the thing it's about? Most of the confusion here comes from treating "generated image" as one category. It's two. Images that should persist: an OG card referenced in a page's <head>, a product shot, an avatar, anything a crawler will come back for in two years. These want permanent storage — either a vendor that keeps them indefinitely, or your own bucket, which is what the bring-your-own-storage tier exists for. Don't build these on a link that expires. (This is exactly why our OG-image walkthrough takes the bytes and writes them to static assets rather than using a share link.) Images tied to something that itself expires: a voucher graphic, an event badge, a proof you're sending a client, a one-off share. These are the ones where indefinite retention is quietly a liability. A two-year-old link to a 30%-off graphic is still live, still screenshot-able, still being posted to deal forums, long after the offer died. Nobody ever schedules the cleanup. For the second category, expiry isn't a limitation you work around — it's the behaviour you want. A voucher that stops being valid on 23 September and a voucher image that stops loading on 23 September are the same promise, kept consistently, without you writing a lifecycle rule. Question 3: can you delete one? Separate from expiry: if a single image needs to come down now — wrong price, wrong name, customer asked — is there an endpoint for that? Fewer vendors document this than you'd expect. Placid has a documented DELETE /api/rest/images/{id}. Templated has DELETE /v1/render/{id}. For several others we couldn't find one in the API reference at all, which doesn't prove it's absent, but does mean you'd be opening a support ticket rather than making a call. Zandovi's is DELETE /api/v1/shares/{shareId}, on every plan, and it hard-deletes the object rather than hiding it. There's also a Shared Links tab in the editor for people who'd rather click a button, where workspace owners and admins can see and revoke every link in the organization — which matters mostly for the case where someone leaves and their links keep resolving. One honest caveat: shared images are cached at the edge for up to five minutes. Revoking purges that cache, but treat it as "stops being available shortly," not "vanishes this instant." The bonus question: can you still get the bytes? Here's the one place our answer genuinely differs from most of the field, and it's the opposite of what we originally assumed. Most vendors in this category return a URL and nothing else. Bannerbear, Placid, Templated, Abyssale, RenderForm, HTML/CSS to Image and Switchboard all answer with a hosted link; if you want the file itself you fetch that link in a second round trip. A few offer both — APITemplate has an opt-in file export, Bannerify has separate endpoints, Orshot lets you pick url, base64 or binary. Zandovi is in that smaller group, with bytes as the default: # bytes — the default, unchanged since we launched curl -X POST https://app.zandovi.com/api/v1/templates/$TEMPLATE_ID/generate \ -H "X-Api-Key: $ZANDOVI_API_KEY" \ -H "Content-Type: application/json" \ -o voucher.png \ -d '{ "variables": { "first_name": "Sarah", "code": "VIP30" }, "format": "png" }'# a hosted link — add one field curl -X POST https://app.zandovi.com/api/v1/templates/$TEMPLATE_ID/generate \ -H "X-Api-Key: $ZANDOVI_API_KEY" \ -H "Content-Type: application/json" \ -d '{ "variables": { "first_name": "Sarah", "code": "VIP30" }, "format": "png", "delivery": "link" }'Same render, same single charge against your quota. delivery picks how the result comes back, not what it costs. Having both matters more than it sounds. Writing the file to your own storage is a one-step operation when the render hands you bytes, and a fetch-then-write when it hands you a URL. Conversely, putting an image in an email is trivial with a URL and a hosting project with bytes. Most workflows want one or the other, and which one flips depending on the job — sometimes within the same codebase. It also decides how much friction you hit in a no-code tool. Binary responses are the single most common thing people get wrong when calling an image API from n8n, Make or Zapier — leave the response format on JSON and you get an unhelpful parse error. We wrote up the HTTP-node recipe for those platforms, and asking for a link is the shortcut that skips the whole binary-handling problem. Why the URL matters at all: email If you're wondering why anyone cares about the delivery format, transactional email is the sharpest case. Email clients are hostile to every approach except one. Inline data: URIs get stripped by Outlook and ignored by much of the rest. Attaching the image works technically, but it inflates the message and a promotional graphic as an attachment is a good way to get filed somewhere nobody looks. Gmail clips messages over roughly 102 KB, and a clipped message hides your call to action behind a "View entire message" link. What works is boring and has worked for twenty years: <img src="https://img.zandovi.com/s/8f3c2ad9e1b74c05.png" alt="Your £30 voucher" width="600">Which makes the whole flow one function: async function voucherEmail(order) { const res = await fetch( `https://app.zandovi.com/api/v1/templates/${TEMPLATE_ID}/generate`, { method: 'POST', headers: { 'X-Api-Key': process.env.ZANDOVI_API_KEY, 'Content-Type': 'application/json', }, body: JSON.stringify({ variables: { first_name: order.firstName, code: order.voucherCode, expires_at: order.expiresAt, }, format: 'png', delivery: 'link', }), }, ) if (!res.ok) throw new Error(`render failed: ${res.status}`) const share = await res.json() return mailer.send({ to: order.email, subject: 'Your voucher is inside', html: `<img src="${share.url}" alt="Your voucher" width="600">`, }) }Store share.expiresAt next to the order. When someone asks for a resend after it lapses, re-render rather than digging for a dead link. If you're rolling your own renderer Everything above assumes you're using a hosted API. If you're generating images yourself — Satori/@vercel/og, Puppeteer, sharp, node-canvas — then you're in a different position: you get bytes, always, and the entire hosting question is yours. That's the case where "just put it in a bucket" turns into a bucket, a public-access policy, a CDN, a key-naming scheme that doesn't let one customer guess another's filenames, an expiry policy, something that actually enforces it, and an admin path for taking one image down. It's a real afternoon, and then it's a permanent thing you operate. Worth knowing that's the trade before you start, because it's usually invisible in the "generate an OG image in 10 lines" tutorials. What share links are not Three limitations, stated plainly, because finding them out later is worse. Not permanent. Seven to a hundred and eighty days by plan, then the object is deleted rather than archived. For anything that must persist, use delivery: "binary" and your own storage. Not private. Anyone holding the URL can open it — no password, no per-viewer expiry, no referrer check. The token is 256 bits of randomness with no relationship to your template or account, so nobody enumerates them, but unguessable is not the same as secret. Think twice before rendering someone's full name next to their order details into a link you email. Not a CDN you control. Five-minute edge cache, one purge on revoke, fixed response headers. The short version Whatever you're using, three things are worth checking today:How long does the URL live? If the docs don't say, ask support and write the answer down. The range across this category is seven days to indefinite. Can you delete one on demand? Look for a documented DELETE endpoint. Can you get the raw bytes when you need them? Most vendors say no.For Zandovi the answers are: a plan-based window returned in every response, yes via DELETE /api/v1/shares/{shareId}, and yes — bytes are still the default.Share links in the API reference Sharing from the editorVendor behaviour above was checked against each vendor's own API documentation and pricing pages in August 2026. These change often — verify before you commit to anything on the strength of a blog post, including this one.
- 20 Aug, 2026
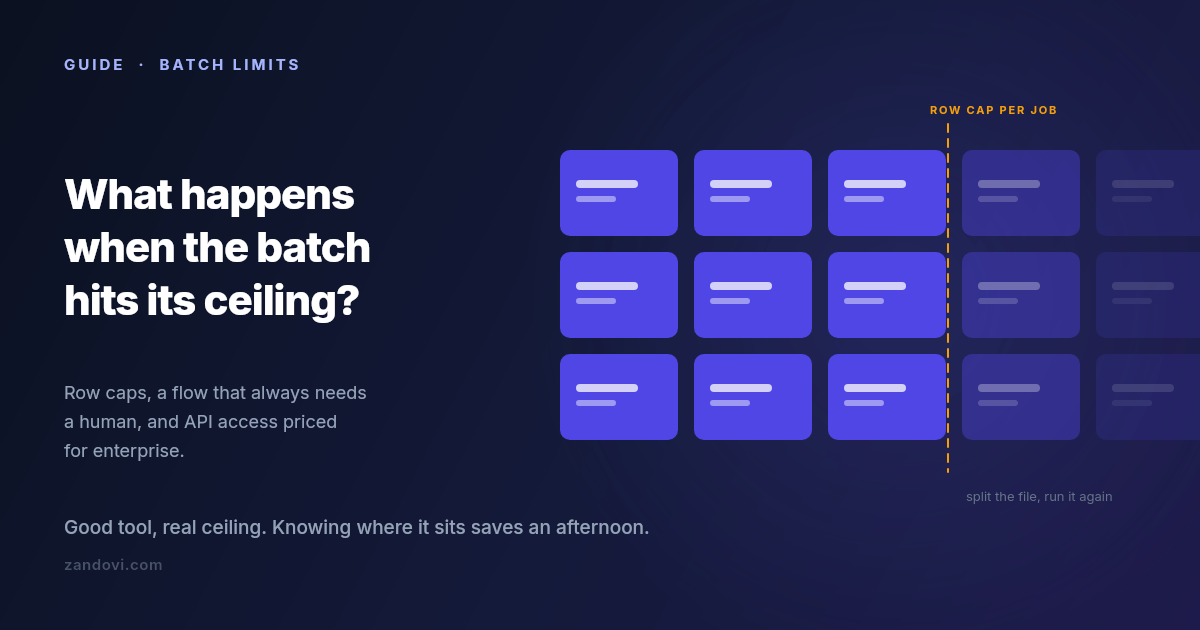
Canva Bulk Create: The Limits, and What to Do When You Hit Them
We make a tool that competes with part of what Canva does, so weigh this accordingly. It's also true that most people reading this should probably stay where they are, and this post says where that line is. Canva's Bulk Create is a good feature. You build a design, connect a spreadsheet, map columns to text and image placeholders, and get a personalized copy per row. For name badges, social variants and simple certificates, it is often the fastest path from data to output, and if it's working for you there's no reason to change anything. But there's a specific set of walls people hit, and hitting one tends to send you searching. Here's what they are. Wall 1: rows per batch Bulk Create caps how many rows you can process in one go. Canva's help center documents the current figure, which has been in the low hundreds, and the cap applies per batch, so a larger dataset means splitting the file and repeating the process. The documented cap is usually not the real limit anyway. Each row becomes a page in a single Canva document, so a few hundred rows produces a few hundred pages in one file, and the editor gets progressively heavier to work with. In practice most people find their comfortable batch size well below the technical maximum. Not because it stops working, but because reviewing and exporting a 300-page document is its own chore. If you're generating a few hundred items a few times a year, splitting the file is genuinely fine. If it's a recurring weekly job, the splitting is the problem. Wall 2: it's a human-in-the-editor flow This is the bigger one, and it's structural rather than a number you can raise. Bulk Create is something a person does: open the design, connect the data, map the fields, generate, review, export. There is no version of it that fires when a form is submitted, when an order completes, or when a row lands in a database. Someone has to be at the keyboard. That's fine for campaign work. You sit down, you make the batch, you're done. It doesn't work at all for anything continuous. If your certificates should be issued the moment a learner finishes a course, or the voucher should be in the welcome email that goes out ninety seconds after signup, no amount of batch processing gets you there. You need something a server can call. Wall 3: programmatic access is gated high Canva does have a developer platform. The Connect APIs include autofill endpoints that populate a brand template from data programmatically, which is exactly the capability the previous section is asking for. The catch is the plan requirement. Per Canva's own documentation, using the Autofill APIs in production requires the integration to act on behalf of a user in a Canva Enterprise organization; users on other paid plans get limited access while an integration is under development. If you're a solo operator or a small team on Pro or Teams, that path isn't open to you at the price you're currently paying. So the honest summary is that automated generation exists in the Canva ecosystem, and it's priced for organizations rather than for the person with a spreadsheet and a deadline. Wall 4: the details that surface at scale Smaller than the first three, but they're what people actually complain about once volume goes up. No per-field validation before generating. Bulk Create maps whatever is in the cell. If row 88 has a malformed date or a code in the wrong format, you find out by looking at page 88. At twenty rows you'd notice. At three hundred you won't, and the error reaches whoever receives it. Unique codes per row need care. A single QR code on a design is easy. A different QR code per row, one encoding each recipient's own redemption or verification URL, is a different requirement, and it's worth testing on three rows before you commit a whole campaign to it. Print output. Canva exports print-quality PDFs, but if your requirement is a specific DPI, exact physical dimensions, and predictable behaviour when a print shop opens the file, this is worth verifying carefully rather than assuming. Long values break layouts. A name twice as long as your test data will overflow or wrap unless the text element is set up to handle it. This bites everyone, in every tool, and it's the single most common cause of a batch that has to be regenerated. Option A: stay, and split Worth saying plainly: if you generate a few hundred items a handful of times a year, splitting the spreadsheet costs you fifteen minutes per campaign. That is cheaper than migrating, cheaper than learning a new tool, and cheaper than adding a subscription. Canva's design capabilities and asset library are genuinely excellent, and none of the walls above are about design quality. Split by something meaningful, like cohort or date or region, rather than by arbitrary row ranges, and the resulting files stay organized on their own. Option B: write a script If you're comfortable with code, generating personalized images from a CSV is a solid afternoon of Python or Node. You get complete control and no subscription. You also get to own it. Font rendering, the PDF library's quirks, and the layout code all become yours to maintain, and the person who needs the design changed next quarter has to ask you rather than doing it themselves. That trade is worth it for some teams and clearly not for others. Option C: a tool built for the batch case The third option is a design editor whose batch and API paths aren't an afterthought. This is what we built Zandovi to be, and here's the concrete comparison rather than a pitch. Batch from a spreadsheet. Design once, download a CSV whose headers already match your template's variable names, fill it, upload it. Rows are validated against the template's rules before anything renders, so mismatched columns, missing required values, values outside a variable's allowed list and QR data that won't encode all get caught up front — along with an advisory flag on any column whose values run far longer than the design allows for. You fix them in the sheet and re-upload. Then you get a ZIP with one file per row, rather than a many-page document to export. Row caps per job are 25 on the free plan, 100 on Personal, 200 on Studio, 300 on Team and 400 on Business. So this is not an unlimited-rows story either, and large datasets still get split. What changes is the validation and the output shape. The same design, callable. The template you built for the batch flow is also an API endpoint: POST the variable values, get PNG, JPEG, WebP or PDF bytes back. And the batch flow itself is callable too: POST /api/v1/batch-jobs takes the same rows as the CSV tab, runs the same up-front validation, and returns the same ZIP, so "we need this automated" doesn't mean rebuilding the batch as a loop. Every paid plan includes full API access, with no enterprise tier standing between you and automating it. That's the wall-2 and wall-3 answer in one. Unique codes per row are the normal case. QR and barcode elements bind to variables like any text field, so each row can carry its own redemption link or verification URL without a workaround. Print output is explicit. DPI is a setting (96, 150 or 300), PDF costs the same as a PNG with no format multiplier, and the canvas can be set up in millimetres or inches from the start.Where Canva is still the better answer Being fair about this matters more than winning the comparison. Design breadth is the obvious one. The stock library, the font selection, the sheer number of starting points: that's Canva's moat, and it's a real one. So is familiarity. If four people need to edit the design and all four already use Canva, that's worth more than any feature comparison. Occasional, low-volume batches don't justify adding a tool either. A few hundred items twice a year is not a problem worth solving with a second subscription. And if you're already on Teams or Enterprise, the API question is settled and brand controls come with it. The case for moving is narrower than a vendor blog usually admits: you're generating regularly, the volume makes the manual flow tedious, you need validation or unique codes per row, or you need a server to trigger it and don't have Enterprise. Moving one design, if you do Don't migrate everything. Pick the single design causing the most repetitive work and rebuild just that one:Rebuild the layout on a canvas of the same dimensions. An hour, usually less. Mark the changing elements as variables, setting which are required and which have a fixed list of allowed values. This is the step with no Canva equivalent, and it's what stops bad rows from becoming bad output. Download the generated CSV template and paste your existing data under the headers. Run a batch of five rows first. Check the longest name, the shortest name, and anything with an accent or a non-Latin character. Then run the real batch.The free plan includes 100 renders a month with no card, which is enough to rebuild one design and test it properly before deciding anything.References: Canva Bulk Create help, Canva Connect Autofill API docs. Both were checked in July 2026. Canva's limits and plan requirements change, so confirm the current figures on their pages before making a decision.
- 15 Aug, 2026
Generating Images Inside an n8n, Make or Zapier Workflow (With Just an HTTP Node)
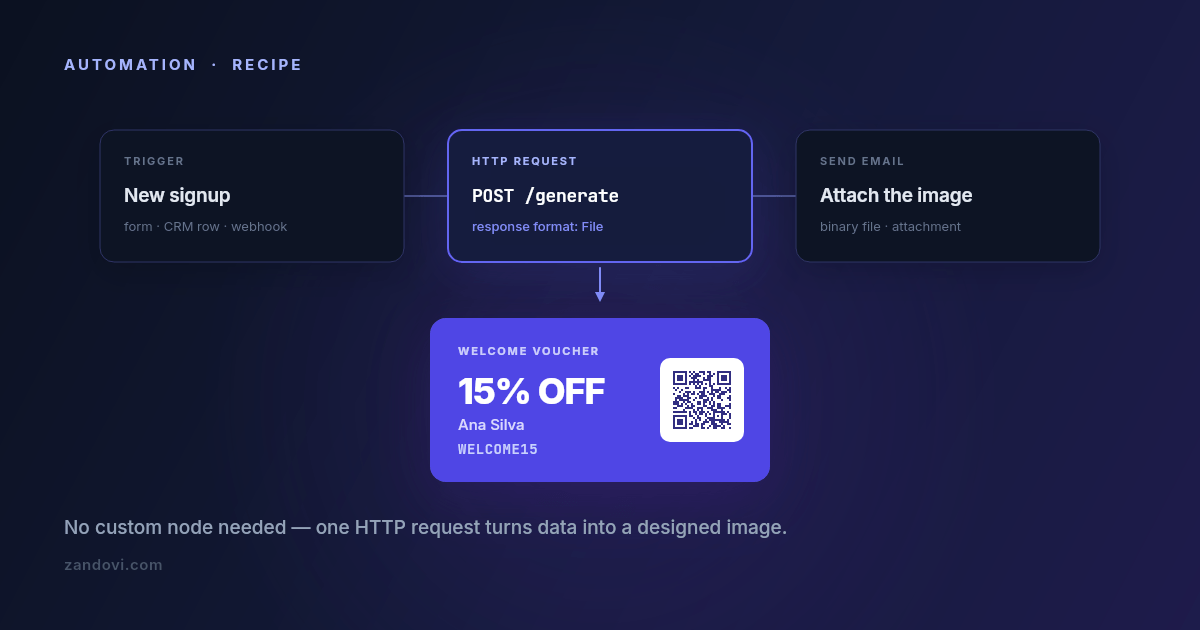
Automation platforms are very good at moving text and data around. A form submission becomes a database row becomes a Slack message becomes an email, and none of it takes code. Then someone asks for the email to include a personalized voucher with the recipient's name and a scannable code on it, and the workflow stops. Every node in the chain handles strings and JSON; none of them draws. The usual workarounds are all bad in the same way. Pre-generating a few hundred images defeats the point of personalizing them. Passing the data to a designer puts a human in a loop that was supposed to be automatic. Spinning up a small rendering service means you now operate a small rendering service. The fix is one node: an HTTP request that sends your values and receives an image back. Up front: there's no native node yet We don't ship an n8n community node, a Make app, or a Zapier integration today. It's on the roadmap and the n8n one is first, but it doesn't exist as you read this, and telling you otherwise would waste your afternoon. What does exist is a plain REST API that returns image bytes, which every one of these platforms can call with its built-in HTTP module. That's what this post sets up. It's four or five fields of configuration, and it works today. The request you're making One endpoint does the work: POST https://app.zandovi.com/api/v1/templates/{templateId}/generateWith a header for your API key, a JSON body of variable values, and a response that is the image itself: raw bytes, not a JSON envelope with a URL inside it. { "variables": { "customer_name": "Ana Silva", "discount_code": "WELCOME15", "expires_at": "30 Sep 2026", "voucher_qr": "https://example.com/redeem/WELCOME15" }, "format": "png", "options": { "scale": 2 } }The one design decision to get right before you touch the workflow: which parts of the image are variables. Any text, image, QR code or barcode element in the template can be one. In the example above, voucher_qr is a QR element whose content comes from the request, so every generated voucher carries its own redemption link. You'll also want the template's exact variable names. Ask the template itself: GET https://app.zandovi.com/api/v1/templates/{templateId}The response lists each variable's name, type and whether it's required. Read calls like this don't consume render quota, so you can call it as often as you like while building. n8n n8n is the most straightforward of the three because its HTTP Request node handles binary responses natively. Start by storing the key as a credential. Create a Header Auth generic credential with name X-Api-Key and your key as the value. Don't paste the key into the node. A credential keeps it out of exported workflow JSON, which matters the first time you share a workflow with someone. Then add an HTTP Request node and configure it:Field ValueMethod POSTURL https://app.zandovi.com/api/v1/templates/YOUR_TEMPLATE_ID/generateAuthentication Generic Credential Type → Header Auth → the credential aboveSend Body on, JSONBody the JSON above, with expressions in place of literalsResponse → Format FileThat last setting is the one people miss. Left on the default, n8n tries to parse image bytes as JSON and you get an unhelpful error. Set the response format to File and the image arrives as binary data on the item, ready for the next node. Use expressions for the values rather than hard-coding them, so they pull from earlier nodes: {{ $json.customer_name }} {{ $json.discount_code }} {{ new Date().toLocaleDateString('en-GB', { day: 'numeric', month: 'short', year: 'numeric' }) }}Then do something with it. The binary property flows straight into a Send Email node as an attachment, a Google Drive upload, a Slack file post, or an S3 node. This is the payoff: the image is now just another piece of data in the workflow.Or ask for a link instead Everything above handles the image as binary, which is why the Response Format setting matters so much. There is a second option that sidesteps that entirely. Add "delivery": "link" to the request body and the endpoint publishes the render and answers with JSON instead of bytes: { "url": "https://img.zandovi.com/s/8f3c2ad9e1b74c05.png", "expiresAt": "2026-09-23T09:00:00Z" }Now leave the response format on its default. There's no binary property to configure, no "Parse response" toggle to remember, and the URL is an ordinary string that maps into a Slack message, an Airtable attachment field, a Notion block, or an <img> tag in an email node like any other value from an earlier step. The trade-off is that the link expires — seven days on the free plan, thirty to a hundred and eighty on paid ones — and anyone holding it can open it. For a workflow that sends the image somewhere within the minute, that's usually the right shape. For anything that has to persist, keep the binary version above and put the bytes in your own storage. There's a fuller write-up, including how other vendors handle retention, in Your Render Came Back as a URL. How Long Does It Last? Make.com Same shape, different labels. Use the HTTP → Make a request module, with the method set to POST and the URL pointing at the generate endpoint. Add X-Api-Key and Content-Type headers, set the body type to Raw or JSON with your variable values mapped in from earlier modules, and turn Parse response off. Leaving "Parse response" off is the equivalent of n8n's File setting. It tells Make to keep the binary payload intact rather than trying to interpret it. The result appears as file data that downstream modules (Email, Google Drive, Dropbox) accept directly. Zapier Zapier is the fiddliest of the three, because its webhook step is built around text and JSON responses rather than binary payloads. The Webhooks by Zapier → Custom Request action (a premium feature) will make the POST. What you do with the response depends on what comes next: attaching raw binary to a later step is where people typically run into trouble. Two paths tend to work better. You can use a Code by Zapier step to make the request and handle the response yourself, base64-encoding it if the next step needs a string. Or you can render, store, then link: push the image into your own storage and pass the resulting URL along, so every subsequent Zapier step is handling a plain string. If your automation lives entirely in Zapier and images are central to it, be honest with yourself about whether the extra steps are worth it versus running this one piece elsewhere. Three details that will save you a support ticket Deduplicate in the workflow, because the generate endpoint won't do it for you. It has no idempotency key: every call renders again and spends another render, even when the variables are identical. Automation platforms retry steps more often than people expect, on their own schedule, so a step that looks like it ran once may have run three times. (The batch endpoint is the exception; it takes an Idempotency-Key header and a retried submission is neither billed nor rendered twice.) Guard it on your side. Store something per event, like a rendered_at timestamp or the resulting file URL on the record that triggered the workflow, then put an IF node in front of the HTTP request that skips it when that field is already set. It's two extra nodes, and it's the difference between a quota you can predict and one you can't explain. Branch on the error code, not just the status. Two different 429s exist. One has code: RATE_LIMIT_EXCEEDED and means slow down, so retry after a short pause. The other has code: QUOTA_EXCEEDED and means you're out of renders for the billing period, where retrying achieves nothing until the reset. A workflow that treats them identically will either hammer the endpoint pointlessly for two weeks or give up on a transient blip. 502 and 503 are worth an exponential backoff. n8n's "Retry On Fail" and Make's error-handler routes both cover this without custom logic. Failed renders are refunded automatically, so a retry after a genuine service error doesn't cost you twice. Watch the quota headers. Every successful render returns X-Quota-Remaining and X-Quota-Reset. A tiny branch in the workflow that posts to Slack when remaining drops below some threshold turns "the vouchers stopped sending" into "heads up, we're at 400 renders left". Cheap to build, disproportionately useful. Recipes worth stealing Welcome voucher on signup. A new row in your CRM or a new form submission triggers the flow, which generates a voucher image carrying the customer's name, a code, and a QR pointing at the redemption URL, then attaches it to the welcome email. Personalized, and nobody touched it. Certificate on course completion. A completion webhook from your LMS triggers a PDF certificate at 300 DPI with the learner's name and a verification QR, which gets emailed with a copy dropped in Drive. This is the automated counterpart to the spreadsheet batch flow, and it's the same template. Social card on new content. A new CMS entry generates a branded card with the title and author, which goes to Slack for approval or straight to the scheduling tool. The design lives in the editor, so marketing can restyle it without asking anyone to redeploy. What to know before you build on this There's no native node yet, so you're wiring HTTP modules. That's a handful of fields, but it isn't a one-click install, and the UI labels above move slightly between platform versions. The concepts hold; the exact field names may not. Rate limits are real. The API throttles per second, so a loop firing hundreds of parallel requests will hit it. Keep concurrency modest and let the retry logic handle the rest. Better yet, if a workflow step fans out over a whole dataset rather than reacting to one event, don't loop at all: submit the rows as one batch job and poll it, which sidesteps both the rate limit and the retry problem in one move. Renders are metered, including the ones your workflow generated by accident during testing. The free tier's 100 renders a month is enough to build and test a workflow properly; a production automation firing on every signup needs a paid plan. Which brings up the last one: watch your test runs. The single fastest way to burn a free tier is a misconfigured trigger firing 80 times while you debug. Pin sample data while building and only go live once the node is right.The API quickstart has the same request in curl, JavaScript and Python if you'd rather test it outside the workflow first. And if you'd find a native n8n node useful, tell us. The order we build integrations in is decided by who asks.
- 12 Aug, 2026
What a Rendered Image Actually Costs: Image Generation API Pricing in 2026
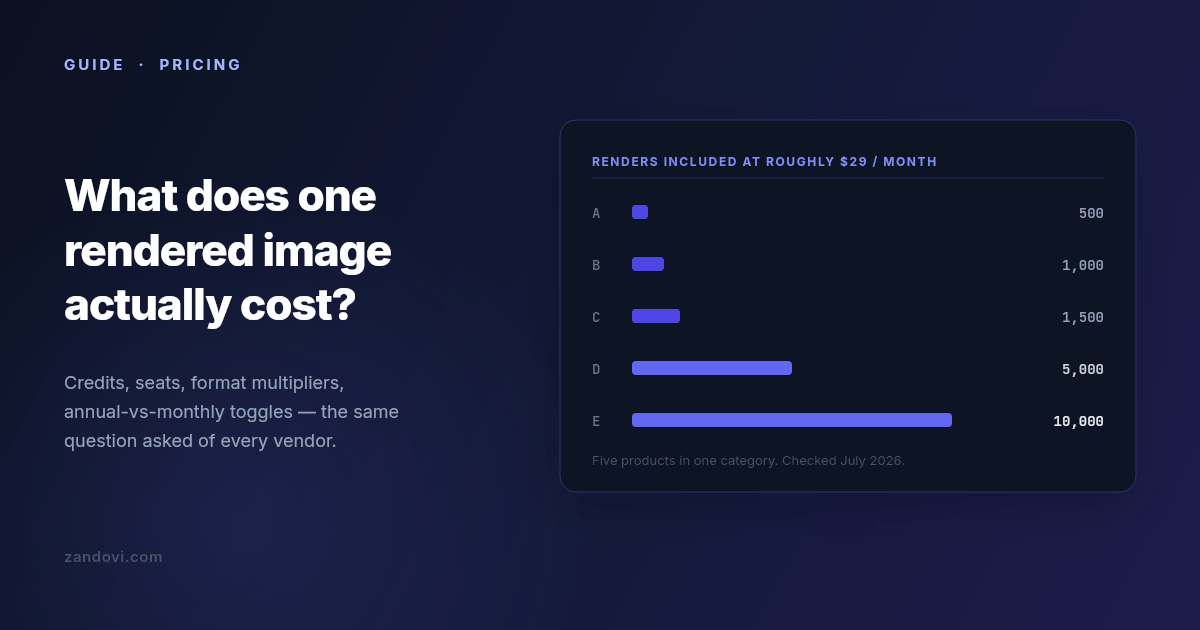
We build one of the products in this category, so read this with that in mind. What follows is the comparison we had to do for ourselves, written down. Every number is from the vendor's own public pricing page, checked in July 2026, and linked so you can verify it. Linked also so you can catch it when it goes stale, because these pages change every few months. Why these pricing pages are hard to compare Five things make a straight comparison awkward, and only some of them are accidental. Credits are not renders. Some vendors charge one credit per image and some charge multiples for certain outputs. A PDF might cost two credits per page. A video costs by duration. If your workload is mostly PDFs, a plan advertising 5,000 credits might deliver 2,500 documents. Annual prices are shown as if they were monthly. The large number on the page is often the annual-billing rate divided by twelve. Paying month to month costs meaningfully more, commonly 15-25%. Check which toggle is selected before you write the number down. Some vendors meter per seat. A plan at $45 per seat with 450 credits per seat looks cheap next to a $149 flat plan until you have four people, at which point it isn't. Free tiers range from generous to decorative. "Free" sometimes means a recurring monthly allowance and sometimes means a one-time bundle of trial credits that never refills. Those are very different things when you're evaluating. What counts as a render varies. On most platforms, exporting an image by hand from the web editor consumes the same credit an API call would. On a few, it doesn't. If your team does a lot of manual design work alongside the automated pipeline, this is the difference that dominates the bill. The number to compare Ignore the plan names. Compute cost per 1,000 renders at the tier you'd actually be on. Not the cheapest tier, and not the enterprise one, but the one that covers your realistic monthly volume with maybe 30% headroom. Then check whether your specific output type carries a multiplier. Entry tiers, July 2026 Prices as listed on each vendor's public pricing page in July 2026. Where a vendor shows annual pricing by default, the monthly rate is noted.Product Entry plan Renders included ≈ Cost / 1,000 Free tierPlacid $19/mo 500 credits ~$38 Trial creditsBannerbear $49/mo 1,000 credits ~$49 30-credit trialTemplated $29/mo 1,000 credits ~$29 One-time 50 creditsAPITemplate.io $29/mo billed annually ($35 monthly) 1,500 renders ~$19-23 50/moZandovi $29/mo 5,000 renders ~$5.80 100/moAnd the higher tiers, where the per-render economics usually improve:Product Mid tier Renders ≈ Cost / 1,000Placid $39/mo 2,500 ~$16APITemplate.io $69/mo 9,000 ~$7.70Bannerbear $149/mo 10,000 ~$15Zandovi $79/mo 25,000 ~$3.20The part most comparisons leave out If you stop reading at the table above, you'll conclude that the established vendors are expensive and everything else is cheap. That's not quite the shape of the market in 2026, because there's a whole second group of products that compete purely on render economics. As of July 2026, that group includes Imejis (around $24.99 for 10,000 renders, with 100 free per month), Bannerify ($29 for 10,000, also with a recurring free tier), RenderForm (from about $9 for 250, with credit rollover), HTML/CSS to Image (around $14 for 1,000) and Switchboard (around $19 for 1,000). Look at those numbers next to the table and the honest conclusion is that on price per render alone, the budget group wins, and nobody in the established group beats them. That includes us. Bannerify sells 10,000 renders for the same $29 that buys 5,000 from Zandovi. We're saying this out loud because it's the thing you'd find in twenty minutes anyway, and because it points at the actual question. If cost per render were the only variable, this would be a one-line market and the cheapest vendor would have all of it. It isn't, so the useful question is what you give up at each price. What you're actually buying at each price point The budget group is typically API-first. You give it HTML/CSS or a simple template definition and it gives you an image, fast and cheap. What's usually thin or absent: a real visual editor a non-engineer can use, batch processing from a spreadsheet, print-ready output at a controlled DPI, team accounts with roles, and template management beyond a list. If your rendering need is well-defined, high-volume, and owned entirely by engineers, this group is very hard to argue against. The established group charges more per render and sells operational maturity: years of uptime history, mature integration ecosystems, video and GIF generation in Bannerbear's case, support you can escalate to. If you're integrating rendering into a product your customers depend on, that history is worth paying for and the per-render delta is probably noise in your budget. Seat-metered products like Abyssale price around teams rather than volume. If your usage is five designers each making a moderate number of assets, that model can work out cheaper than volume pricing. If it's one server making 100,000 calls, it won't. Six questions that change the answer more than the headline price How long does the hosted image live, and can you delete one? Almost every vendor here answers a render with a hosted URL, so the question isn't whether you get one — it's what happens to it afterwards, and that's where the documentation thins out. We checked in August 2026: APITemplate.io keeps paid renders indefinitely, HTML/CSS to Image keeps them while your account is active, RenderForm expires free-tier images after 14 days, Switchboard uses a flat seven days on every plan, and several others don't state a policy at all. Seven days versus indefinite is a completely different architecture on your side. Ask the same question about deletion — a documented DELETE endpoint is less common than you'd expect. (Ours expire on a plan-based window returned in every response, and revoke via DELETE /api/v1/shares/{shareId}; that's shorter retention than some vendors here, deliberately. Details in Your Render Came Back as a URL. How Long Does It Last?) One related thing genuinely is a higher-tier feature across this category: bring-your-own-storage, i.e. pointing the renderer at your own S3 bucket. Bannerbear puts it on Enterprise, APITemplate.io on Enterprise, Templated on Scale, Bannerify on Business, Switchboard on Agency. If you need renders landing in your own infrastructure, price that in — we don't offer it at all today. Does your output type carry a multiplier? If you generate PDFs, ask specifically. One credit per page versus two per page doubles your bill and appears nowhere in the headline number. What happens at the limit? Most of this category hard-stops when you exhaust your quota, and requests start failing until the reset. A few sell overage credits instead. Neither is wrong, but they fail differently. A hard stop means a broken feature and an upgrade decision at 2am, while overage means a surprise on the invoice. Know which one you've bought. Do editor exports count? If your team designs in the web editor and exports by hand, check whether those exports draw from the same pool as your API calls. On most platforms they do. Is the free tier recurring? A monthly allowance lets you build, test in CI, and run a small side project indefinitely. A one-time trial bundle lets you evaluate for an afternoon. Both are legitimate; only one is useful to develop against. How many templates can you have? Template caps exist on some entry plans and are a recurring complaint in reviews of this category. If you're generating across a dozen designs, a three-template cap ends the evaluation regardless of render price. A rough decision guide If you need images inside a product, at volume, and engineers own the whole pipeline, start with the budget group. The economics are genuinely better and the missing features are ones you may not need. If you need a track record, integrations that already exist, or video, Bannerbear and Placid are the incumbents for a reason. Pay the premium and stop thinking about it. If non-engineers need to own the designs, you need a real editor, and the field narrows sharply. Most cheap renderers are code-first by design. And if your workload is bursty and human-driven, a few hundred certificates after an event or a set of vouchers per campaign rather than steady API traffic, look for spreadsheet batch processing and check what a manual export costs you. Where we fit, stated plainly Zandovi is $29/month for 5,000 renders, with 100 free per month on a recurring basis. Against the category leaders that's several times more renders per dollar. Against the budget flank it isn't the cheapest, and we're not going to pretend otherwise. What we're actually built around is the combination: a full visual canvas editor where any text, image, QR code or barcode can be a variable; spreadsheet batch generation that outputs a ZIP; print-ready PDF at 300 DPI with no format multiplier; and unlimited manual editor exports on every paid plan, because metering someone's design work by the click never made sense to us. If you need none of that, buy renders from whoever sells them cheapest. That's a real answer, and for a lot of workloads it's the right one. Verify before you commit Every number here has a date on it and a link next to it, and that's deliberate. This category re-prices constantly: over the twelve months to July 2026 at least three of the products named above restructured their plans. Before you sign up for anything, open the linked pricing page and confirm the number yourself, paying attention to the annual/monthly toggle. And build a small proof of concept on the free tier before you commit to a year. Cost per render is easy to compare on a spreadsheet and rarely the thing that decides whether a tool works for you.Sources: Bannerbear pricing, Placid pricing, APITemplate.io pricing, Templated pricing, Zandovi pricing. All figures checked July 2026.