- 12 Aug, 2026
What a Rendered Image Actually Costs: Image Generation API Pricing in 2026
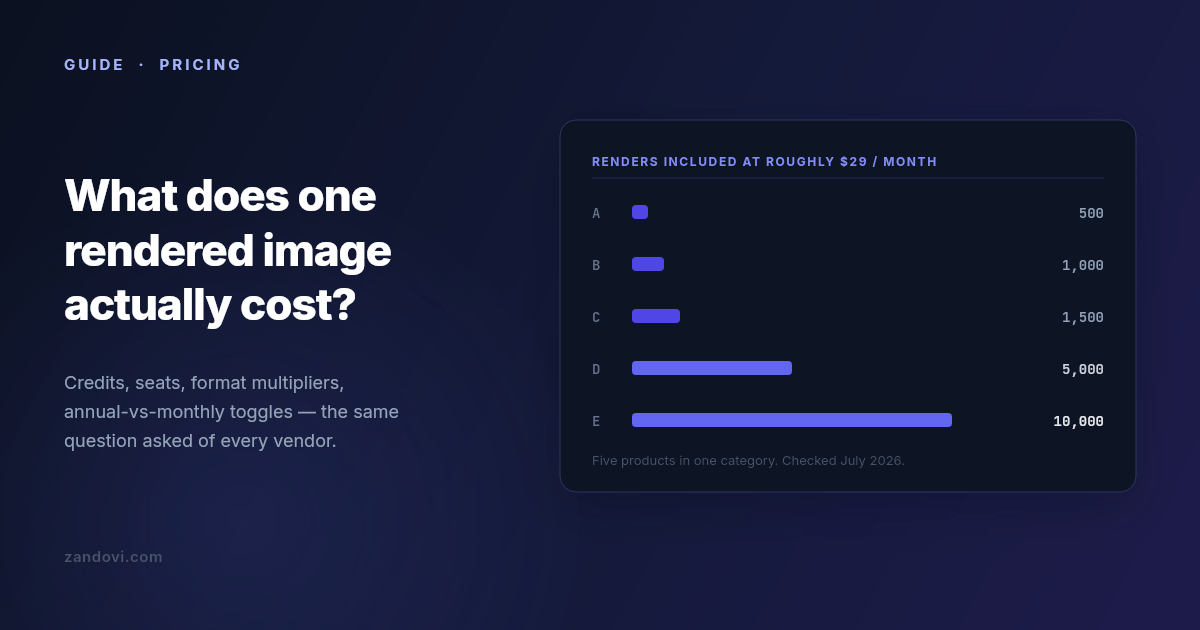
We build one of the products in this category, so read this with that in mind. What follows is the comparison we had to do for ourselves, written down. Every number is from the vendor's own public pricing page, checked in July 2026, and linked so you can verify it. Linked also so you can catch it when it goes stale, because these pages change every few months. Why these pricing pages are hard to compare Five things make a straight comparison awkward, and only some of them are accidental. Credits are not renders. Some vendors charge one credit per image and some charge multiples for certain outputs. A PDF might cost two credits per page. A video costs by duration. If your workload is mostly PDFs, a plan advertising 5,000 credits might deliver 2,500 documents. Annual prices are shown as if they were monthly. The large number on the page is often the annual-billing rate divided by twelve. Paying month to month costs meaningfully more, commonly 15-25%. Check which toggle is selected before you write the number down. Some vendors meter per seat. A plan at $45 per seat with 450 credits per seat looks cheap next to a $149 flat plan until you have four people, at which point it isn't. Free tiers range from generous to decorative. "Free" sometimes means a recurring monthly allowance and sometimes means a one-time bundle of trial credits that never refills. Those are very different things when you're evaluating. What counts as a render varies. On most platforms, exporting an image by hand from the web editor consumes the same credit an API call would. On a few, it doesn't. If your team does a lot of manual design work alongside the automated pipeline, this is the difference that dominates the bill. The number to compare Ignore the plan names. Compute cost per 1,000 renders at the tier you'd actually be on. Not the cheapest tier, and not the enterprise one, but the one that covers your realistic monthly volume with maybe 30% headroom. Then check whether your specific output type carries a multiplier. Entry tiers, July 2026 Prices as listed on each vendor's public pricing page in July 2026. Where a vendor shows annual pricing by default, the monthly rate is noted.Product Entry plan Renders included ≈ Cost / 1,000 Free tierPlacid $19/mo 500 credits ~$38 Trial creditsBannerbear $49/mo 1,000 credits ~$49 30-credit trialTemplated $29/mo 1,000 credits ~$29 One-time 50 creditsAPITemplate.io $29/mo billed annually ($35 monthly) 1,500 renders ~$19-23 50/moZandovi $29/mo 5,000 renders ~$5.80 100/moAnd the higher tiers, where the per-render economics usually improve:Product Mid tier Renders ≈ Cost / 1,000Placid $39/mo 2,500 ~$16APITemplate.io $69/mo 9,000 ~$7.70Bannerbear $149/mo 10,000 ~$15Zandovi $79/mo 25,000 ~$3.20The part most comparisons leave out If you stop reading at the table above, you'll conclude that the established vendors are expensive and everything else is cheap. That's not quite the shape of the market in 2026, because there's a whole second group of products that compete purely on render economics. As of July 2026, that group includes Imejis (around $24.99 for 10,000 renders, with 100 free per month), Bannerify ($29 for 10,000, also with a recurring free tier), RenderForm (from about $9 for 250, with credit rollover), HTML/CSS to Image (around $14 for 1,000) and Switchboard (around $19 for 1,000). Look at those numbers next to the table and the honest conclusion is that on price per render alone, the budget group wins, and nobody in the established group beats them. That includes us. Bannerify sells 10,000 renders for the same $29 that buys 5,000 from Zandovi. We're saying this out loud because it's the thing you'd find in twenty minutes anyway, and because it points at the actual question. If cost per render were the only variable, this would be a one-line market and the cheapest vendor would have all of it. It isn't, so the useful question is what you give up at each price. What you're actually buying at each price point The budget group is typically API-first. You give it HTML/CSS or a simple template definition and it gives you an image, fast and cheap. What's usually thin or absent: a real visual editor a non-engineer can use, batch processing from a spreadsheet, print-ready output at a controlled DPI, team accounts with roles, and template management beyond a list. If your rendering need is well-defined, high-volume, and owned entirely by engineers, this group is very hard to argue against. The established group charges more per render and sells operational maturity: years of uptime history, mature integration ecosystems, video and GIF generation in Bannerbear's case, support you can escalate to. If you're integrating rendering into a product your customers depend on, that history is worth paying for and the per-render delta is probably noise in your budget. Seat-metered products like Abyssale price around teams rather than volume. If your usage is five designers each making a moderate number of assets, that model can work out cheaper than volume pricing. If it's one server making 100,000 calls, it won't. Six questions that change the answer more than the headline price How long does the hosted image live, and can you delete one? Almost every vendor here answers a render with a hosted URL, so the question isn't whether you get one — it's what happens to it afterwards, and that's where the documentation thins out. We checked in August 2026: APITemplate.io keeps paid renders indefinitely, HTML/CSS to Image keeps them while your account is active, RenderForm expires free-tier images after 14 days, Switchboard uses a flat seven days on every plan, and several others don't state a policy at all. Seven days versus indefinite is a completely different architecture on your side. Ask the same question about deletion — a documented DELETE endpoint is less common than you'd expect. (Ours expire on a plan-based window returned in every response, and revoke via DELETE /api/v1/shares/{shareId}; that's shorter retention than some vendors here, deliberately. Details in Your Render Came Back as a URL. How Long Does It Last?) One related thing genuinely is a higher-tier feature across this category: bring-your-own-storage, i.e. pointing the renderer at your own S3 bucket. Bannerbear puts it on Enterprise, APITemplate.io on Enterprise, Templated on Scale, Bannerify on Business, Switchboard on Agency. If you need renders landing in your own infrastructure, price that in — we don't offer it at all today. Does your output type carry a multiplier? If you generate PDFs, ask specifically. One credit per page versus two per page doubles your bill and appears nowhere in the headline number. What happens at the limit? Most of this category hard-stops when you exhaust your quota, and requests start failing until the reset. A few sell overage credits instead. Neither is wrong, but they fail differently. A hard stop means a broken feature and an upgrade decision at 2am, while overage means a surprise on the invoice. Know which one you've bought. Do editor exports count? If your team designs in the web editor and exports by hand, check whether those exports draw from the same pool as your API calls. On most platforms they do. Is the free tier recurring? A monthly allowance lets you build, test in CI, and run a small side project indefinitely. A one-time trial bundle lets you evaluate for an afternoon. Both are legitimate; only one is useful to develop against. How many templates can you have? Template caps exist on some entry plans and are a recurring complaint in reviews of this category. If you're generating across a dozen designs, a three-template cap ends the evaluation regardless of render price. A rough decision guide If you need images inside a product, at volume, and engineers own the whole pipeline, start with the budget group. The economics are genuinely better and the missing features are ones you may not need. If you need a track record, integrations that already exist, or video, Bannerbear and Placid are the incumbents for a reason. Pay the premium and stop thinking about it. If non-engineers need to own the designs, you need a real editor, and the field narrows sharply. Most cheap renderers are code-first by design. And if your workload is bursty and human-driven, a few hundred certificates after an event or a set of vouchers per campaign rather than steady API traffic, look for spreadsheet batch processing and check what a manual export costs you. Where we fit, stated plainly Zandovi is $29/month for 5,000 renders, with 100 free per month on a recurring basis. Against the category leaders that's several times more renders per dollar. Against the budget flank it isn't the cheapest, and we're not going to pretend otherwise. What we're actually built around is the combination: a full visual canvas editor where any text, image, QR code or barcode can be a variable; spreadsheet batch generation that outputs a ZIP; print-ready PDF at 300 DPI with no format multiplier; and unlimited manual editor exports on every paid plan, because metering someone's design work by the click never made sense to us. If you need none of that, buy renders from whoever sells them cheapest. That's a real answer, and for a lot of workloads it's the right one. Verify before you commit Every number here has a date on it and a link next to it, and that's deliberate. This category re-prices constantly: over the twelve months to July 2026 at least three of the products named above restructured their plans. Before you sign up for anything, open the linked pricing page and confirm the number yourself, paying attention to the annual/monthly toggle. And build a small proof of concept on the free tier before you commit to a year. Cost per render is easy to compare on a spreadsheet and rarely the thing that decides whether a tool works for you.Sources: Bannerbear pricing, Placid pricing, APITemplate.io pricing, Templated pricing, Zandovi pricing. All figures checked July 2026.
- 07 Aug, 2026
How to Generate Certificates From a Spreadsheet (CSV to ZIP, No Mail Merge)
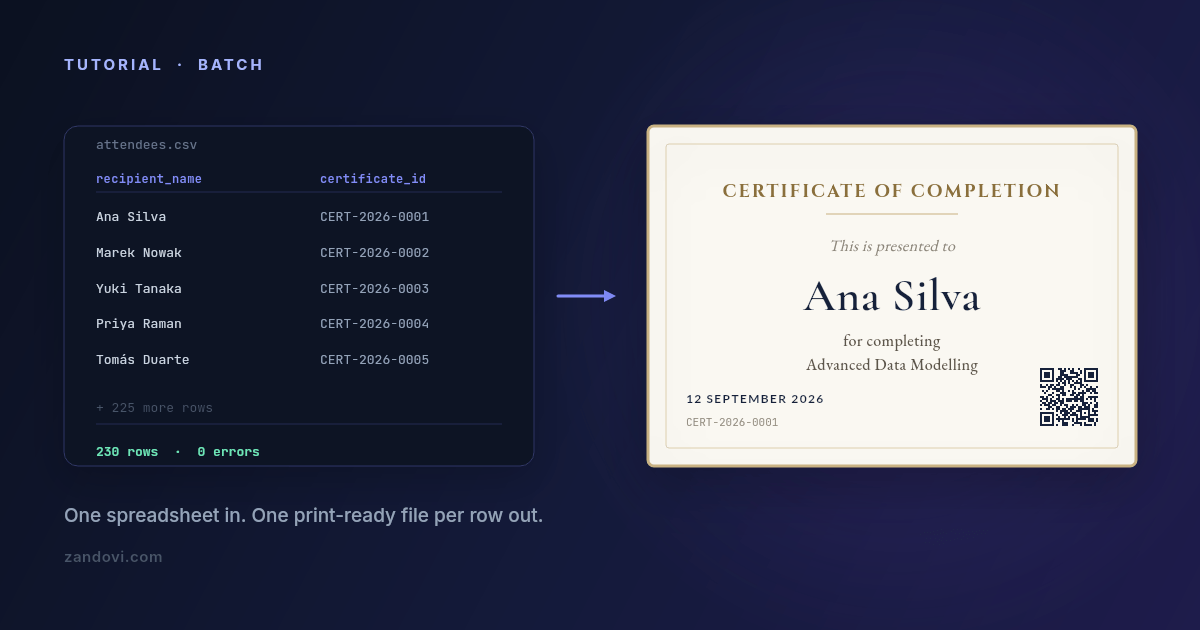
The course finished on Friday. Two hundred and thirty people attended. Each of them needs a certificate with their own name spelled correctly, the course title, the completion date, and something that makes it look like it came from an organization rather than from a word processor at 11pm. You have all of that in a spreadsheet already. The gap is turning 230 rows into 230 files. Why the usual routes hurt Mail merge. Word and Google Docs will merge names into a document, and for plain text on white paper that's fine. Certificates aren't plain text. They're a layout, with a border, a logo, a signature block, and typography that has to sit exactly where you put it. Merging into a designed document tends to nudge things by a few pixels per record, and you find out at print time. Duplicating slides. The 230-slides-in-a-deck approach. It works, and it costs an entire afternoon, and any change to the design means doing it again. Design-tool bulk features. Better, and genuinely the right tool for some jobs. The limits show up as row caps, no automation hook, and export formats that aren't print-ready. A script. If you're comfortable with code, generating certificates from a CSV in Python is a solid afternoon's work. Then you own the layout code, the font loading, and the PDF generation forever. What follows is the fourth route: design the certificate once in an editor, mark the parts that change, upload the spreadsheet, download a ZIP. Step 1: design the certificate Start from a certificate template or a blank canvas. If these will be printed, set the canvas up for print from the start: pick an A-series or US Letter preset in landscape, and set the export DPI to 300. Doing this first matters. A canvas sized for the screen and scaled up afterwards is how you end up with a soft logo on a printed certificate.Lay out the fixed parts: border, organization logo, the words "Certificate of Completion", the signature line. These never change, so they're just design. Step 2: mark what changes as variables This is the step that turns a design into a generator. Select each element that differs per person, mark it as a variable, and give it a name:Variable Element Notesrecipient_name text Set auto-fit so "Bartholomew Featherstonehaugh" and "Li Wei" both look intentional.course_title text Usually identical across the batch. Give it a default value and you can leave the column out.completion_date text Dates travel through as text, so format them in the spreadsheet exactly as they should print.certificate_id text Mark it required so a blank cell is caught rather than rendering an empty line.verify_qr QR code Encodes a verification URL. See below.Give every variable a description too. It shows up as guidance later, and if someone else ever fills the spreadsheet, that one sentence prevents most of the back-and-forth. Where a column should only ever hold a handful of known values, set its Allowed values list. Type in the real values and anything else in that column is rejected before rendering, which is the cheapest way to stop a typo becoming 230 wrong certificates. A note on the QR code. Binding a QR element to a variable lets each certificate carry its own verification link, https://yoursite.com/verify/{certificate_id}, which is how you make a certificate checkable rather than merely decorative. Keep the QR element at least 100×100 px and use the Print Safe button to get the quiet zone right; QR codes printed too small or too close to a border are the number one reason scans fail on paper.Step 3: get the CSV with the right headers Click Generate, then the Batch tab, then Download CSV Template. This gives you a CSV whose header row already matches your variable names exactly. Use it. The most common failure in bulk generation is a column called Name when the template expects recipient_name, and starting from the generated file removes that entire category of problem. Open it in Excel, Google Sheets or Numbers, and paste your data underneath. One row per certificate: recipient_name,course_title,completion_date,certificate_id,verify_qr Ana Silva,Advanced Data Modelling,12 Sep 2026,CERT-2026-0001,https://example.com/verify/CERT-2026-0001 Marek Nowak,Advanced Data Modelling,12 Sep 2026,CERT-2026-0002,https://example.com/verify/CERT-2026-0002 Yuki Tanaka,Advanced Data Modelling,12 Sep 2026,CERT-2026-0003,https://example.com/verify/CERT-2026-0003If you're building the ID and verification URL from a spreadsheet formula, double-check the first and last rows after filling down. Off-by-one errors in a fill-down are invisible until someone scans a code and lands on the wrong person's record. Step 4: upload and let validation do its job Drag the completed CSV into the upload area. Three things happen before anything renders. Your column headers are matched against the variable names, so a missing required column is flagged immediately and any column the template doesn't recognise is called out as ignored. Then every row is checked: a missing required value, a value outside a variable's allowed list, or QR data too long to encode all get reported with the row and column named. Finally, any column whose values run much longer than the default you designed around is flagged as a fit risk, so you find out that one name is three times the length of the rest before it shrinks to unreadable. You get a summary like "3 errors in 230 rows" with a table naming each one. Fix them in the spreadsheet, re-upload, re-validate. This step is the whole reason to prefer a validated batch over a script you wrote on Thursday. Catching three bad rows before rendering costs you two minutes. Catching them after you've printed and mailed 230 certificates costs considerably more.Step 5: choose your output, then submit Pick the format and resolution. Use PDF at 300 DPI for anything going to a printer or a print shop, and PNG at 2× scale for anything going into an email or a download link. Then Submit Batch. The job appears in the list below with a status of PENDING, PROCESSING, COMPLETED or FAILED, along with the row count and how long ago you submitted it. When it's done, Download Results gives you a ZIP with one file per row. If a job comes back FAILED, expanding it in the list tells you which rows failed and why. Renders that fail are refunded to your quota, and a batch rejected at validation is never charged at all, so a failed job doesn't cost you anything except the time to fix and resubmit. The row limits, stated plainly Batch jobs have a per-job row cap that depends on your plan:Plan Rows per jobFree 25Personal 100Studio 200Team 300Business 400So a 230-person course is one job on Team, two on Studio, three on Personal. The practical workaround for a larger cohort is to split the spreadsheet by cohort, session or date, which is usually how you want the files organized anyway. Sort the sheet first, then split; that way each ZIP maps to something meaningful rather than to an arbitrary row range. Every rendered row counts as one render against your monthly pool, the same as an API call. 230 certificates is 230 renders. On the $29 Personal plan that's 5,000 renders a month, so the certificates for a busy training calendar fit comfortably; on the free plan's 100 renders, a single mid-sized cohort will use most of it. There's also a maximum output resolution that varies by plan. The free plan tops out around A5 at 300 DPI, paid plans go to A4/US Letter and above. If you're producing large-format certificates, check that before designing the canvas rather than after. Making the files easy to hand out Two things worth deciding before you generate rather than after. The first is file naming. Files in the ZIP are named from your data, so having a certificate_id column pays for itself here. A ZIP of CERT-2026-0001.pdf files is trivially matchable against your attendee list. A ZIP of certificate-1.pdf files is not. The second is delivery. If you're emailing these individually, keep the same CSV as the source of truth: it already has the name, the ID, and, if you add a column, the email address. The ZIP and the sheet then line up row for row, and whatever you use to send the mail can join them without a manual matching step. When to move from the spreadsheet to the API The batch flow is a browser workflow: a person uploads a file and downloads a ZIP. That's the right shape when certificates are an event. A cohort finishes, you generate a set. It's the wrong shape when certificates are a continuous stream. If your platform issues one the moment a learner finishes a course, at unpredictable times, you want the same template called from your backend instead: one POST per completion, PDF bytes back, attached to an email or stored against the learner record. Same template, same variables, no spreadsheet. And if it's the cohort itself that lives in your system rather than in a spreadsheet, there's a third shape: the batch API. Your backend submits the whole roster as a rows array in one request and downloads the same ZIP this post builds by hand, with the certificate_id filename trick intact via a filename pattern. Same engine as the upload tab, no CSV file, no person at a keyboard. Most teams end up using both. The API covers the automated path, and the batch tab covers the "we ran a workshop and need 40 certificates by Thursday" path that never quite fits the automated one.The batch generation guide covers the dialog in detail, and the free plan gives you 100 renders a month so you can try a real cohort without a card.
- 04 Aug, 2026
Dynamic OG Images With an API, Without Running a Headless Browser
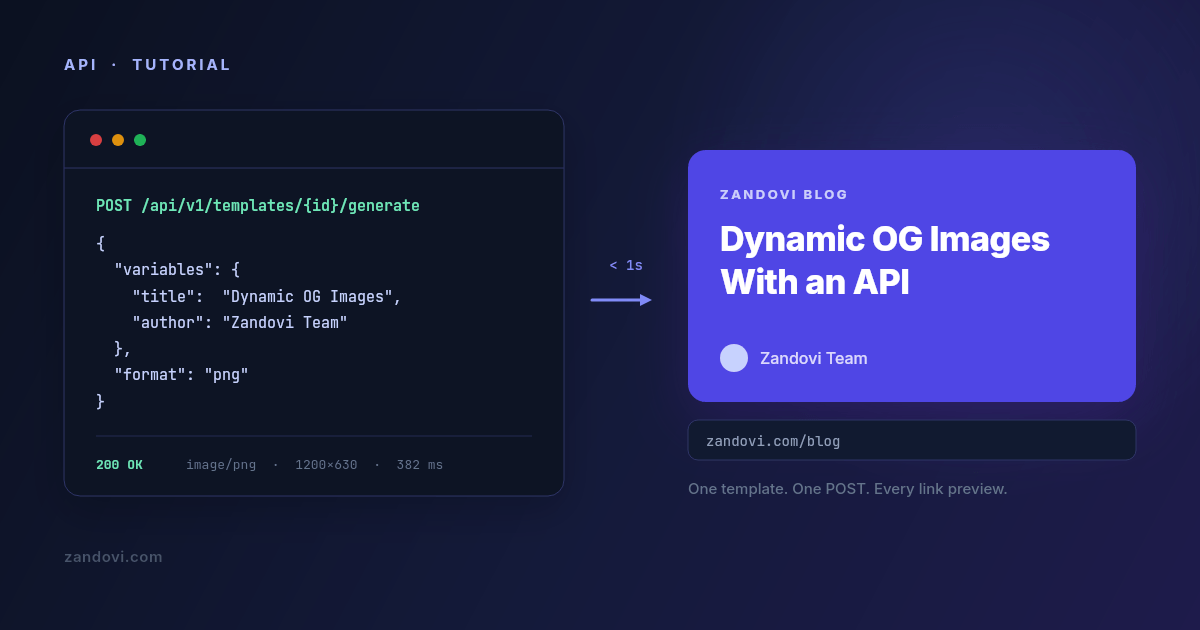
Every content site eventually needs the same thing: a link preview image per page, with the page's own title on it. Share a post on X, LinkedIn or Slack and the card that appears is doing real work. It's the difference between a link that gets clicked and a link that scrolls past. Making one by hand is fine. Making four hundred is not. So the question becomes how you generate them, and the answer you find online is usually one of three, each with a cost that isn't obvious until you're maintaining it. The three usual approaches Hand-made in a design tool. Highest quality, zero automation. Works until you publish weekly, at which point it becomes a recurring chore nobody wants and eventually gets skipped. A headless browser. Write the card as HTML and CSS, load it in Puppeteer or Playwright, screenshot the viewport. This works. It's how a lot of production systems do it, and it's genuinely the right answer if you already run a browser farm for other reasons. What you're signing up for is a Chromium binary in your deploy artifact, cold starts measured in seconds, memory limits that bite at the worst time, and a font-loading bug on the day you switch base images. The rendering isn't the hard part. Operating the thing that renders is. A JSX-to-SVG renderer like Satori (what @vercel/og uses under the hood). Much lighter than a browser and a genuinely good fit for simple cards. The trade-off is that you're writing your design in a constrained subset of CSS, in code, and every visual change is a code change and a deploy. If a non-engineer ever wants to adjust the layout, they can't. There's a fourth option that gets less attention: treat the card as a designed template with named variables, and render it over HTTP. The design lives in a visual editor, the code sends values. That's the approach this post walks through, using Zandovi's API. What the flow looks likeDesign the card once in the editor, marking the parts that change (title, author, category) as variables. Send a POST with those values. Get PNG bytes back.You don't run a browser, there's no build step, and changing the design doesn't need a redeploy. Here's the whole request: curl -X POST https://app.zandovi.com/api/v1/templates/$TEMPLATE_ID/generate \ -H "X-Api-Key: $ZANDOVI_API_KEY" \ -H "Content-Type: application/json" \ -o og.png \ -d '{ "variables": { "title": "Dynamic OG Images With an API", "author": "Zandovi Team", "category": "Engineering" }, "format": "png" }'That's it. The response body is the image itself: raw bytes, Content-Type: image/png, no JSON wrapper to unpack and no second round trip. (That's worth noting, because most render APIs answer with a hosted URL instead and make you fetch it. For OG cards, bytes are what you want: the image has to keep resolving for as long as the page is shared, so it belongs in your own static assets rather than on someone else's expiring link. Zandovi does have a delivery: "link" option — it's just the wrong tool for this particular job. Where it is the right tool, and what to check about any vendor's hosted URLs, is covered in Your Render Came Back as a URL. How Long Does It Last?) Step 1: design the card Create a canvas at 1200×630, the size every platform expects for a link preview. Lay out the background, any logo or gradient, and the text blocks. Then mark the text that changes as a variable. A variable has a name (the key you'll send in JSON), a required flag, and optionally a default value and a list of allowed values. For an OG card you'll typically want:Variable Element Notestitle text The one that matters. Turn on auto-fit so long titles shrink instead of overflowing.author text Give it a sensible default so a missing value doesn't render an empty box.category text Optional. Set its Allowed values to restrict it to your real categories.The auto-fit setting deserves a moment. Blog titles vary wildly in length, and the single most common failure mode for generated cards is a long title running off the canvas or being silently clipped. Auto-fit takes a minimum and maximum font size and picks the largest that fits the box, so a six-word title renders big and a twenty-word title renders smaller but complete. Step 2: get an API key In the app, open Settings → API Keys, name a key (og-images is a fine name) and create it. The key is shown exactly once, so copy it straight into your secret store. Keys are scoped to a workspace and inherit that workspace's quota. export ZANDOVI_API_KEY="your_api_key"Never put this in client-side code. Anyone holding the key can spend your renders. Step 3: ask the template what it accepts Before wiring anything up, have the template tell you its own schema. This avoids the classic bug where your code sends postTitle and the template expects title, and you find out from a support ticket three weeks later: curl https://app.zandovi.com/api/v1/templates/$TEMPLATE_ID \ -H "X-Api-Key: $ZANDOVI_API_KEY"The response includes a variables array with each variable's name, type, whether it's required, and its validation rules. Read endpoints like this one don't consume render quota, so you can call it freely, including from a test that asserts your code and your template still agree. That last point is worth doing. A one-line test that fetches the schema and compares the variable names against the object your code builds will catch a designer renaming a field long before it reaches production. Step 4: render from your app Here's a small helper in TypeScript: type OgFields = { title: string; author: string; category?: string; };export async function renderOgImage(fields: OgFields): Promise<Buffer> { const res = await fetch( `https://app.zandovi.com/api/v1/templates/${process.env.OG_TEMPLATE_ID}/generate`, { method: "POST", headers: { "X-Api-Key": process.env.ZANDOVI_API_KEY!, "Content-Type": "application/json", }, body: JSON.stringify({ variables: fields, format: "png", }), }, ); if (!res.ok) { // Errors are RFC 9457 problem+json const problem = await res.json(); throw new Error( `OG render failed (${problem.status} ${problem.code}): ${problem.detail} ` + `[requestId=${problem.requestId}]`, ); } return Buffer.from(await res.arrayBuffer()); }Two details in there are load-bearing. The first is that there's no server-side deduplication on this endpoint, so calling twice costs twice. Every POST to the generate endpoint is a fresh render against your quota, even if the variables are byte-identical to the last one. That makes "don't call it twice" your job, not the server's. Derive a stable key from the content, like the post slug or a hash of the fields, check your own cache or storage first, and only call the API on a miss. A retried build or a double-fired webhook is otherwise a second render. (The batch endpoint does take an idempotency key, which is also the answer to the backfill problem: generating cards for four hundred existing posts is one batch job with a {slug} filename pattern, not four hundred calls through this function.) The second is requestId. Every error body carries one, and every successful response carries an X-Request-Id header. Put it in your logs. It's the single piece of information that turns "images sometimes fail" into a traceable incident. Where to call this from The tempting design is a route handler that renders on demand: /og/[slug].png calls the API and streams the result. Don't do that without a cache in front of it. Crawlers, preview bots and link unfurlers hit OG images repeatedly and unpredictably, and each uncached hit is a render off your quota. Two patterns that hold up: Render at publish time. When a post is created or updated, render the card once, upload the bytes to your object storage or CDN, and store the resulting URL on the post record. generateMetadata then just returns a string. One render per post per edit, and serving costs you nothing: export async function generateMetadata({ params }): Promise<Metadata> { const post = await getPost(params.slug); return { title: post.title, openGraph: { images: [{ url: post.ogImageUrl, width: 1200, height: 630 }], }, }; }Render on demand, then cache hard. If you'd rather not add a publish hook, keep the route handler but put your CDN in front of it with a long Cache-Control, and write the rendered bytes to storage on the first miss so the second miss never reaches the API. Because nothing deduplicates on the server side, every cache miss is a paid render. That's exactly why the publish-time pattern above is the safer default.Handling the errors that actually happen Three you should code for. A 400 with code: VALIDATION_ERROR means a required variable is missing or a value failed the template's validation. The details object maps each offending variable name to what was wrong with it. That's a bug in your code rather than a transient failure, so don't retry it. A 429 with code: RATE_LIMIT_EXCEEDED is short-term throttling. Back off and retry, honoring Retry-After. A 429 with code: QUOTA_EXCEEDED means you're out of renders for the month, and retrying won't help until the reset. Branch on the code field rather than the status alone, or your backoff loop will spin pointlessly for two weeks. Every successful render also returns X-Quota-Remaining and X-Quota-Reset. Emitting X-Quota-Remaining as a gauge metric costs you nothing and means you find out you're running low from a dashboard rather than from broken link previews. Failed renders are refunded automatically, so a 502 from the rendering service doesn't quietly cost you anything. What it costs For OG images specifically, the volume is low: one render per post, plus one per edit. A site publishing weekly generates maybe a hundred renders a year. That sits inside the free tier (100 renders a month, no card) with room to spare. The volume argument only shows up when OG images are one job among several. If the same account is also generating certificates, email graphics or social variants, you're looking at the paid tiers: $29/month for 5,000 renders, and manual exports from the editor don't count against that on any paid plan. When this is the wrong tool Be honest about the fit. If the card has to reflect live data at request time, like a leaderboard position or a current price, this isn't it. Caching is what makes the approach cheap, and live data is what breaks caching. A JSX renderer running in your own edge function fits better. If your card is genuinely simple, a title on a solid background and nothing else, @vercel/og will do it in about thirty lines and one dependency. Reach for a template service when the design has enough going on that you want it maintained in an editor rather than in JSX. And if you already operate a browser farm, adding an external dependency to save a screenshot call isn't obviously a win. Where this approach earns its keep is the case in between: a card that's designed rather than laid out in code, that someone non-technical might want to restyle next quarter, and that you'd rather not redeploy to change.Want to try it? The API quickstart goes from key to first rendered PNG in a few minutes, and the free plan includes 100 renders a month with no card required.
- 14 Jul, 2026
Designing Gift Cards People Actually Redeem
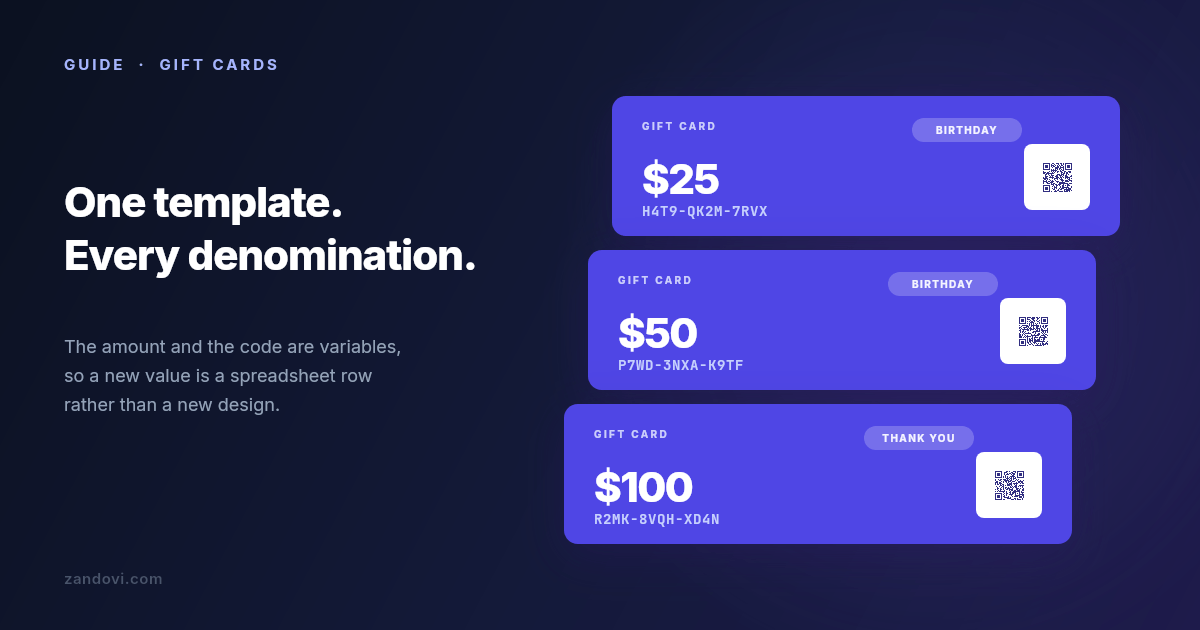
A gift card is an unusual product. Someone pays you today for something you owe later, to a person who didn't choose it. Every card that gets forgotten in a drawer looks like free revenue on this month's numbers and is really a promise sitting on your books, plus a customer who never came in. Breakage rates get quoted anywhere from a few percent to well into double digits, and the honest answer is that it depends entirely on the business. What isn't in doubt is the direction: the easier a card is to understand and use, the more of them come back through the door. A lot of that is design. So this covers what makes a card get redeemed, and then the mechanical part most guides skip: producing a whole set of denominations and codes without laying out each one by hand. Make the value unmissable The amount is the most important element on the card, and it should look like it. Give it more size and weight than anything else, including your logo. The failure mode is a card designed to be tasteful, where the value ends up as small grey text in a corner. Someone pulls it out of an envelope, can't immediately see what it's worth, and puts it back. Hold the design at arm's length. If the number isn't the first thing you read, the hierarchy is wrong. Contrast matters as much as size. A pale gold $50 on a cream background photographs beautifully and is genuinely hard to read in a dim restaurant. Make the redemption path obvious Every question a recipient has to ask costs you redemptions. The card needs to answer four things without anyone thinking about it: what it's worth, where it can be used, how to use it, and whether it expires. That last one deserves care. Gift card expiry is regulated in many places, with minimum validity periods and rules about fees, and the rules differ by country and by state. Check what applies to you rather than copying what another card does. If there's no expiry, saying so plainly is a feature worth printing. Keep the how-to-use line short and specific. "Present this card in store or enter the code at checkout" beats a paragraph of terms. If you need terms, put them on the back in small type where they belong. Design the set, not the card Here's where most gift card projects go wrong. You design a beautiful $25 card, then you need $50, $100 and $250. Then December arrives and you need a festive version of all four. Then a corporate client wants fifty with their logo on them. Designing each one separately means every future change is four to sixteen edits, and they drift apart. One gets the new logo, another keeps the old typography, and after a year your cards don't look like a family. The fix is one master template where the parts that change are variables:Variable Element Notesamount text Format it in the sheet exactly as it should print: $50, not 50.card_code text Mark it required, so a blank cell is caught rather than printing a codeless card.expires_at text Dates print exactly as written, so settle the format in the spreadsheet.occasion text Set its Allowed values to the occasions you actually produce.redeem_qr QR code Encodes the redemption URL for that specific card.Now a new denomination is a row in a spreadsheet, and a rebrand is one edit to one template.Codes that survive being typed by a human If your cards carry a code, someone will read it off a physical card and type it into a phone. Design for that. Drop ambiguous characters from your alphabet. 0 and O, 1 and I and l, 5 and S, 8 and B all cause support tickets, and you lose nothing by excluding them. Group the code so the eye can track it: H4T9-QK2M-7RVX is meaningfully easier to transcribe than H4T9QK2M7RVX. Set the code in a monospace font. Proportional fonts make similar characters harder to distinguish at a glance, and monospace signals "this is a code you type" without a label saying so. Then mark card_code required, so a batch with a blank code fails at upload rather than at the print shop. Generate the codes in the spreadsheet and check the first and last rows after filling down — an off-by-one there is invisible until someone tries to redeem. The QR code beside it does the same job with less friction. Bind a QR element to a variable and each card carries its own redemption link, so a phone can skip the typing entirely. Keep it at least 100×100 px and use the Print Safe button to get the quiet zone right, because a QR crowded against a card edge is a QR that doesn't scan. Match the occasion without forking the design A birthday card and a corporate thank-you shouldn't feel the same, but they should feel like they came from the same business. Handle this with the occasion variable and a swappable image element rather than separate templates. The layout, typography and logo placement stay fixed. The photograph and one or two colours change. Stock imagery is searchable inside the editor across Unsplash, Pexels and Pixabay, so sourcing a seasonal image doesn't mean leaving the app. The discipline is keeping the structure identical across occasions. That's what makes a set of cards read as a range rather than as four unrelated designs. Produce the whole set at once With the template built, the set is a spreadsheet. Download the CSV template from the Batch tab so the headers already match your variable names: amount,card_code,expires_at,occasion,redeem_qr $25,H4T9-QK2M-7RVX,31 Dec 2027,Birthday,https://example.com/gc/H4T9QK2M7RVX $50,P7WD-3NXA-K9TF,31 Dec 2027,Birthday,https://example.com/gc/P7WD3NXAK9TF $100,R2MK-8VQH-XD4N,31 Dec 2027,Thank You,https://example.com/gc/R2MK8VQHXD4NUpload it and every row is validated before anything renders. A missing card code, an occasion outside the allowed values you set on that variable, a column whose name doesn't match the template: all flagged with the row named, so you fix the sheet rather than the output. Then submit and download a ZIP with one file per row. Row caps per job are 25 on Free, 100 on Personal, 200 on Studio, 300 on Team and 400 on Business, so a run of 500 corporate cards gets split across a few jobs. Split them by denomination or by client and each ZIP is something you can hand over as it is.Print and digital are different exports For physical cards, export PDF at 300 DPI. Set the canvas up in millimetres or inches from the start rather than converting later, and pick the DPI before you design, since the options are fixed at 96, 150 and 300. There's no bleed or crop-mark support, so if your design runs colour to the edge, ask your printer what bleed they need and add it by oversizing the canvas yourself, keeping the trim area clear of anything important. Worth knowing before you send the file rather than after. For emailed cards, PNG at 2× scale is the right output. Same template, different export, so the digital and physical versions can't drift apart. What this doesn't do Zandovi generates the card. It doesn't track balances, mark a code as spent, or tell you whether card H4T9-QK2M-7RVX has already been used. That lives in your POS or your ecommerce platform, and it's the part that turns a printed code into a working gift card. Worth being clear about, because a beautifully produced set of cards with no system behind the codes is a set of cards anyone can spend twice. When the spreadsheet stops fitting Batch generation suits how most businesses actually buy gift cards: a run before the holidays, a corporate order, a restock. It stops fitting when cards are sold online and expected instantly. If someone buys a digital gift card at 11pm and wants it in their inbox, you want the same template called from your backend: one POST carrying that card's amount and code, PNG or PDF bytes back, attached to the delivery email. Same template, same variables, nobody at a keyboard. What this costs A run of 100 cards is 100 renders. The free plan's 100 renders a month covers a first batch or a proper test. Personal at $29/month for 5,000 renders covers a seasonal programme comfortably, and manual exports from the editor don't count against it on any paid plan.There are eleven gift card templates in the gallery to start from, and the batch generation guide walks through the upload and validation step by step.
- 12 Jul, 2026
How to Number Event Tickets (And Why the Number Isn't Enough)
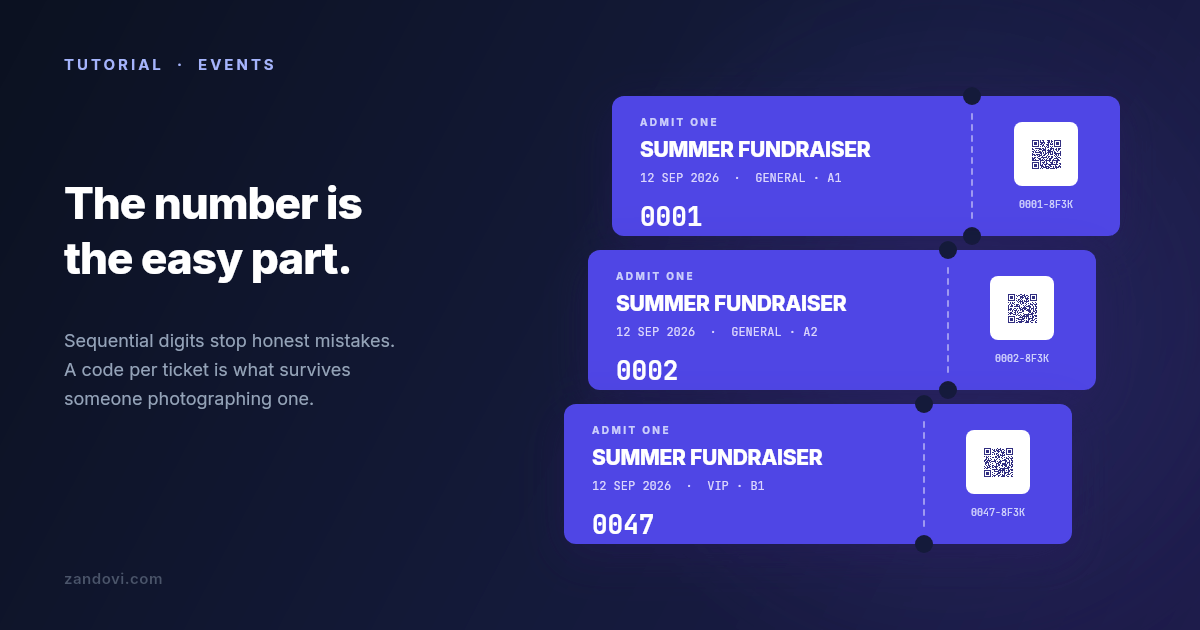
Two hundred tickets for a fundraiser. You design one, it looks good, and then you hit the part nobody writes about: making all two hundred different from each other. The naive version is a sequential number in the corner. That's worth doing, but be clear about what it buys you. A printed number stops you double-selling seat 47 and gives you something to write on a refund note. It does not stop anyone photographing a ticket and showing the photo at the door, because the number on the photo is just as valid as the number on the paper. So this covers both halves: producing the run with real per-ticket data, and making the ticket checkable rather than merely numbered. What a ticket has to do Three jobs, and they pull in different directions. It has to look like your event, which is a design problem. It has to be readable in about two seconds by someone standing in a doorway in bad light, which is a typography problem. And each one has to be distinguishable from every other one, which is a data problem. Most ticket tutorials only solve the first. The door test is the one people underestimate. Whoever is checking tickets is looking for the date, the tier, and whether it's real. Put those three where the eye lands first and let the artwork be artwork. A beautiful ticket that makes someone squint at 7pm is a worse ticket. Start from a template if one fits You don't have to design from nothing. There are 13 ticket designs in the template gallery, covering concerts, festivals, theatre, raffles, parking, sports, conferences and a few others. Open the gallery, choose the Tickets tab, and open whichever sits closest to your event. You can change every colour, font and element afterwards, so pick on layout rather than on palette. Be clear about what that actually saves you. A template gives you the composition and the artwork, which is the slow part. It does not arrive pre-wired with variables, and it's built on a 1200×600 px canvas rather than a physical paper size. So everything below still applies: you set the units and DPI yourself, and you mark your own variables in Step 2. What you skip is the blank page and the hour of nudging things into alignment. Step 1: set the canvas up for print before you design Open the New Canvas dialog and pick from the Tickets preset category, or set your own dimensions. If you're sizing manually, switch the units from pixels to millimetres or inches first. Designing in physical units and letting the app compute the pixels is much less error-prone than picking a pixel size and hoping it lands on a sane paper size. Set the export DPI to 300 now rather than later. The DPI options are fixed at 96, 150 and 300, so this isn't a free-form field you can fine-tune afterwards, and a canvas laid out for screen then pushed to print is how you get a soft logo on 200 pieces of card.One thing to know up front: there's no bleed or crop-mark support. If your design runs colour to the edge and you're using a commercial printer, ask them what bleed they want, then add it yourself by making the canvas that much larger and keeping the trim area clear of anything important. For home printing on perforated stock this doesn't come up. Step 2: decide what changes per ticket Everything that differs between ticket 1 and ticket 200 becomes a variable. Select the element, mark it as a variable, then give it a name:Variable Element Notesticket_number text Pad to a fixed width in the sheet so leading zeros survive. 0047 sorts and reads better than 47.tier text Set its Allowed values to your real tiers, so a typo in the sheet is caught before printing.holder_name text Only if tickets are named. Turn on auto-fit so long names don't overflow.seat text Optional, with the same allowed-values trick as tier if seats come from a fixed set.verify_qr QR code The half that actually matters. See below.Add a description to each one. If someone else fills the spreadsheet later, that single sentence prevents most of the questions. The fixed parts, meaning the event name, date, venue and artwork, stay as ordinary design. They're the same on every ticket, so they never touch your data. Step 3: build the numbers in your spreadsheet Here's the honest bit: there is no auto-increment feature. Zandovi doesn't generate a sequence for you. The numbers come from the CSV you upload, which means your spreadsheet is what produces them. That's less of a limitation than it sounds, because a spreadsheet is genuinely good at this and it leaves the sequence under your control. Download the CSV template from the Batch tab so your headers already match the variable names, then fill down: ticket_number,tier,seat,verify_qr 0001,General,A1,https://example.com/t/0001-8F3K 0002,General,A2,https://example.com/t/0002-QW7P 0003,VIP,B1,https://example.com/t/0003-M2XRTwo habits worth adopting. Pad the numbers to a fixed width (0001, not 1) so they sort correctly and look deliberate. And don't make the verification URL guessable: append a short random suffix to the sequential part, as above. A purely sequential URL means anyone holding ticket 0003 can guess 0004 through 0200. When you're done filling down, check the first and last rows. Off-by-one errors in a fill-down are invisible until someone at the door scans a code that belongs to a different person. Step 4: the QR code is the part that does the work Bind a QR element to the verify_qr variable and every ticket carries its own link. This is the difference between a ticket that looks unique and one that is unique, because the code encodes something your system can check when it's scanned. Three constraints matter once it's on paper. The QR element has a 75×75 px minimum, and 100×100 is the sensible floor, because smaller codes fail to scan at exactly the moment you can't afford it. Use the Print Safe button to get the quiet zone right, since the four-module margin around the code is what lets a scanner find it at all. And test the real printed output before committing to the run: print one, then scan it with the oldest phone you can find, in bad light. If your door hardware is a laser scanner rather than a phone, use a barcode element instead. CODE128 handles alphanumeric ticket IDs, with EAN13, UPC, CODE39 and ITF14 also available. Barcodes have their own minimums of 100 px wide and 40 px tall. One caveat worth stating plainly: generating the code is not the same as validating it. Zandovi produces a ticket carrying a unique URL. Whether that URL has already been used at the door is a question for whatever sits behind it, whether that's your event platform, a spreadsheet someone ticks off, or a small app you write. If nothing checks the code, the QR is decoration. Step 5: let validation catch the bad rows Upload the CSV in the Batch tab. Before anything renders, your headers are matched against the variable names and every row is checked against the template's rules. Missing required values get flagged, as does a tier outside your allowed values, or QR data too long to encode. This step matters more for tickets than for almost anything else, because the failure is expensive and late. A bad row in a set of certificates costs you a reprint. A bad row in a set of tickets costs you an argument at the door with someone holding a ticket that doesn't scan.Fix the flagged rows in the sheet, re-upload, re-validate, then submit. Step 6: generate and print Choose PDF at 300 DPI for anything going to a printer. The job appears in the list with a status of PENDING, PROCESSING, COMPLETED or FAILED, and when it's done, Download Results gives you a ZIP with one file per row. Row caps per job depend on your plan: 25 on Free, 100 on Personal, 200 on Studio, 300 on Team, 400 on Business. So a 200-ticket run is one job on Studio and two on Personal. Split by tier or by date rather than by arbitrary row ranges, and each ZIP maps to something you can actually hand to someone. Every rendered row counts as one render against your monthly pool, so 200 tickets is 200 renders. Renders that fail are refunded automatically, and a batch rejected at validation is never charged, so a failed job costs you time and not quota. There's also a maximum output resolution that varies by plan, so if you're producing large-format passes rather than pocket tickets, check that before you design rather than after. Making the ZIP usable on the day Files in the ZIP are named from your data, which is the reason to have a ticket_number column even if the number never appears prominently on the design. A ZIP of 0001.pdf through 0200.pdf can be matched against your guest list. A ZIP of anonymously named exports cannot. Keep the same CSV as your source of truth. It already has the number, the tier and the verification URL, so if you add an email column it becomes both your send list and your door list, and the files line up with it row for row. When to skip the spreadsheet entirely The batch flow is a human workflow. You sit down, you make 200 tickets, you're done. That fits an event, because events have a date and tickets get made before it. It doesn't fit selling tickets continuously. If a ticket should exist the moment someone pays, at whatever hour that happens, you want the same template called from your backend instead: one POST per purchase carrying that buyer's number and URL, PDF bytes back, attached to the confirmation email. Same template, same variables, nobody at a keyboard. The pre-sale run itself can also skip the spreadsheet: if the guest list is already in your database, the batch API takes the same 200 rows in one request and returns the same ZIP, numbered filenames included. It's the upload tab without the upload. Most event organizers end up using both, because the pre-sale run and the walk-up ticket are genuinely different problems. What this costs A 200-ticket event is 200 renders. The free plan's 100 renders a month covers a small event or a test run of one tier. Beyond that you're on Personal at $29/month for 5,000 renders, which covers a season of events rather than a single one, and manual exports from the editor don't count against it.The batch generation guide covers the dialog step by step, and the template gallery has 13 ticket designs to start from rather than a blank canvas.