Ticket Generator: A Practical Guide for Event Organizers
- 29 Aug, 2026
Friday afternoon is where ticket problems get real. The RSVP list keeps growing, the venue wants names on every pass, and the same static PDF suddenly has to carry seat numbers, QR codes, and different access tiers without turning into a manual editing marathon.
A ticket generator solves the middle of that workflow. It takes the artwork and separates it from the data, so the design stays fixed while names, codes, and ticket numbers change per attendee. That distinction matters because a pretty PDF alone doesn’t help with reissue, batch creation, or clean handoff to the tools that scan and validate entries.
Table of Contents
- Why You Need a Ticket Generator Beyond a Pretty PDF
- Designing the Ticket Template for Reliable Scanning
- Rendering Tickets With the API
- Bulk Generation From a CSV Without Writing Code
- Plan Limits and What They Mean for Real Events
- Best Practices for Print, Validation, and Revoking Links
- Where a Ticket Renderer Ends and Event Ops Begins
Why You Need a Ticket Generator Beyond a Pretty PDF
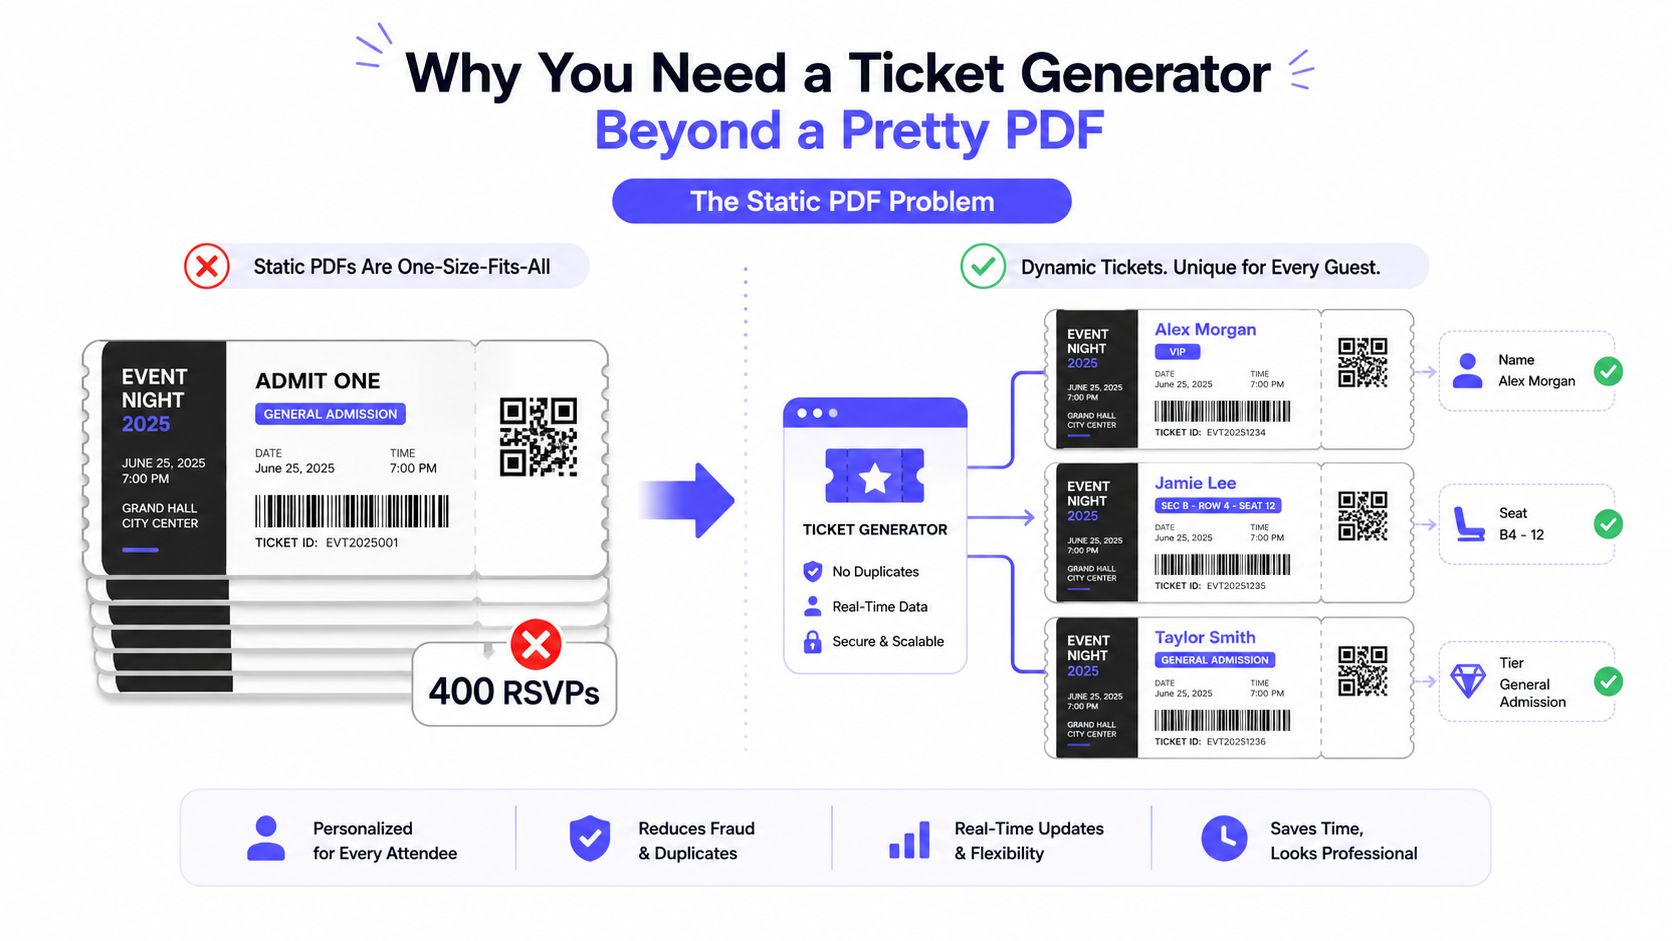
A static PDF works only when every ticket can be identical. The moment an organizer needs unique numbers, personalized names, or different access levels, that approach starts forcing manual edits, duplicate files, and too much room for error.
A real ticket generator treats the design as a template and the attendee list as data. That separation means the same layout can render hundreds of unique tickets without rebuilding each file by hand. It also makes operational changes much easier, because a seat change, sponsor swap, or added note can be reflected in the next render instead of forcing a redesign from scratch.
The operational gap a PDF can’t close
The need for numbered tickets isn’t new. Ticketing has roots in ancient theaters and Roman event control systems, then moved toward more structured admission control in 1755, when theatre managers in London began issuing pre-paid tickets or “checks” to track attendance and revenue more accurately, according to this history of event ticketing systems. Paper tickets with perforated stubs later made large-scale admission practical, and online ticketing pushed the workflow into the digital era.
That history points to the same lesson every event team eventually learns. The ticket isn’t just a graphic, it’s an operational record. A useful generator produces the artwork, but the downstream systems still need to handle scanning, check-in, sales, and fraud controls.
Practical rule: if a ticket can’t be uniquely identified, reissued cleanly, and scanned reliably, it’s still just a flyer with a code on it.
The market reflects that shift. One industry summary pegs total ticketing transaction value at $1.47 trillion in 2025 and projects $3.37 trillion by 2030 (source), which shows how far ticketing has moved beyond a back-office print job. That scale is exactly why the generator should handle the file creation step and leave live entry operations to the systems built for them.
Designing the Ticket Template for Reliable Scanning
A ticket can look polished and still fail at the door. The usual problem is not the artwork. The layout was built like a flyer, while the event team still needs structured data for validation, reissue, and scan checks.
Start with the fields that matter
A usable ticket template should reserve space for the attendee name, ticket ID
or order number, event date, door time, venue, seat or section, and one unique
code per ticket. In a template-based generator, those values bind to
variables such as {{attendee_name}}, {{ticket_id}}, {{seat}}, and the
code field, then render separately for each row.
Images bind the same way, which matters if the ticket needs a sponsor logo, badge art, or a personalized QR asset. A spreadsheet-first organizer usually feels this pain first, because one empty cell or malformed value turns into a bad batch after export.
That is why the template needs validation rules before the first file is generated. Numeric fields should stay numeric, date fields should follow one format, and required placeholders should never be blank. Developers can wire that into the data pipeline. Nontechnical teams can catch the same issues by checking columns before upload.
Make the scan zone part of the design
QR codes and barcodes should not be dropped into a corner at the end. They need a quiet zone, strong contrast, and enough physical size to scan quickly on a handheld device. A folded lanyard or a dim venue entrance can still make a weak code fail, even if the ticket looks clean on screen.
The design step and the operational step serve different jobs. The artwork controls layout, type, and branding. The operations layer handles the code, validation, revocation, and the check-in flow. A template renderer can place the scan asset correctly, but it does not replace the door app or the rules around admission.
For teams using Zandovi, the ticket templates separate editable artwork from per-ticket data binding, which keeps design work from drifting into operations work. That split matters whether you are building from an API or filling rows in a spreadsheet. The template should produce a print-ready file with stable spacing, legible text in PDF export, and the same layout for the same inputs. If the code shifts, the font changes unpredictably, or the fields wrap at random, the door team feels it first.
Rendering Tickets With the API
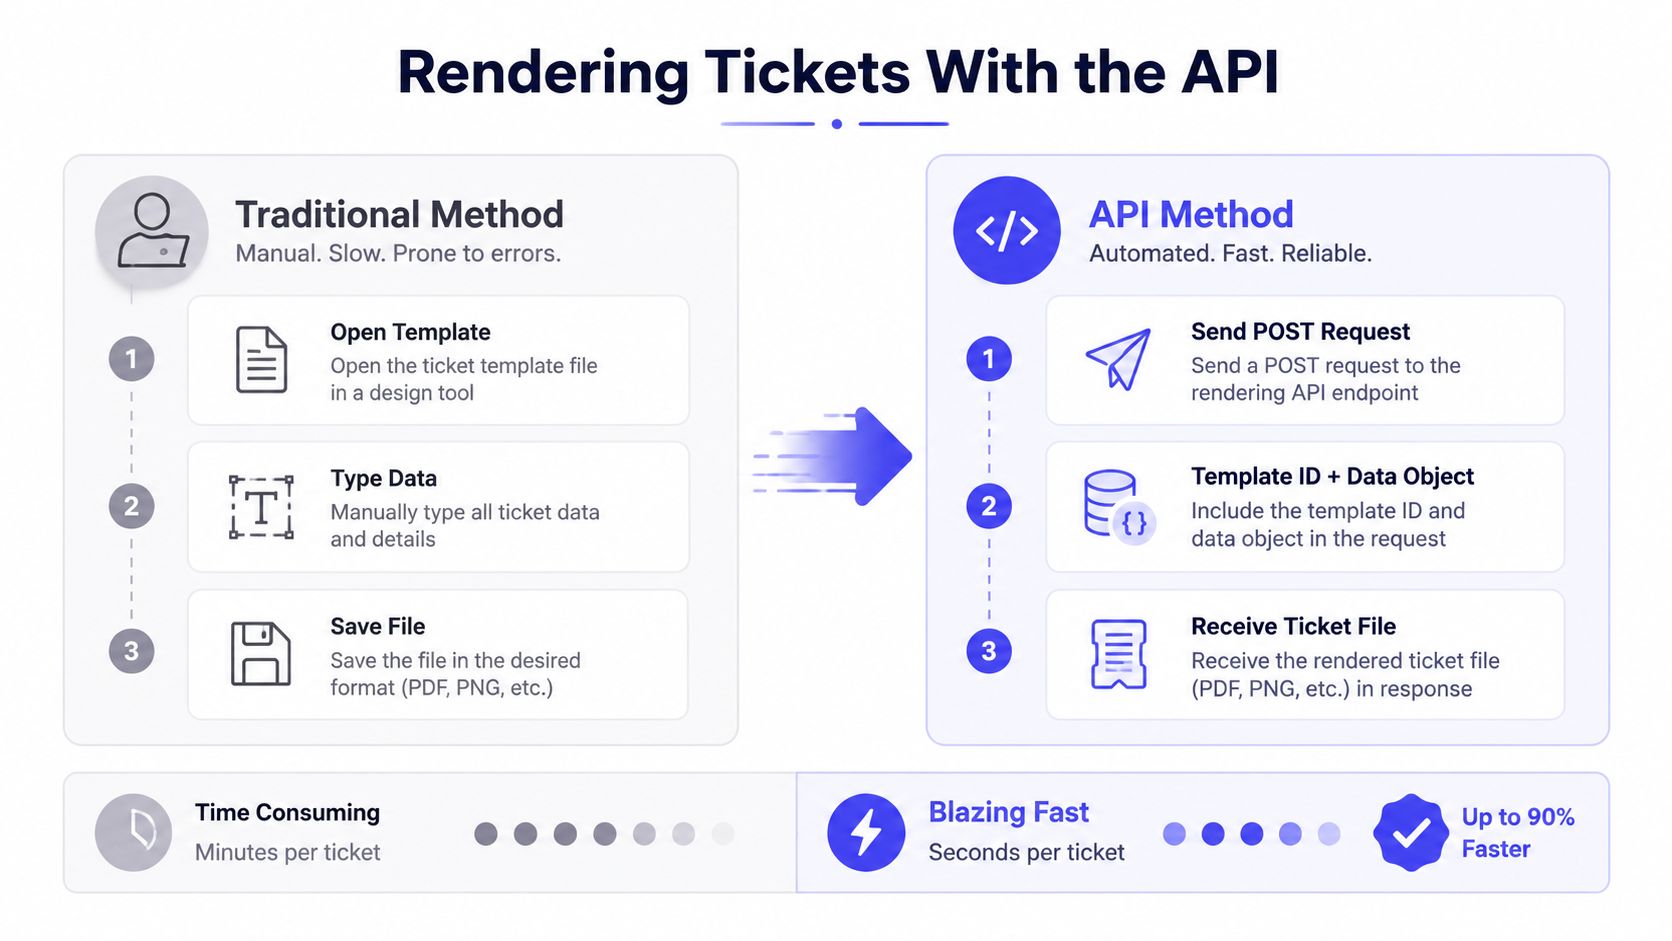
Developers usually want the shortest possible path from registration data to a finished file. The clean pattern is a single POST per ticket, with the template ID in the request and the attendee fields in a JSON object that matches the template variables.
A minimal call looks like this in practice. The body carries template_id: "tpl_conf_2025" and a data object such as attendee_name, ticket_id, seat,
and qr_payload, then the renderer returns the finished ticket. The important
decision is delivery format, because the same render can produce bytes or a
hosted link depending on how the file is going to move through the rest of the
event stack.
Bytes or hosted link
Bytes make sense when the ticket is going straight into an order confirmation email, a download attachment, or a file pipeline the team already controls. That path keeps the artifact under the organizer’s own domain and avoids extra handoffs.
Hosted links fit reissue workflows better. A forwarded link can be regenerated or revoked later, which is useful when a guest loses a ticket or a door team needs a new pass on short notice. Zandovi’s render API does this by default with server-side Skia rendering, not a headless browser, which keeps the result deterministic rather than generative.
One practical warning matters here. The API renders and delivers files, but it doesn’t run payment processing or gate validation. Those belong to downstream systems that ingest the output and decide what happens at purchase, scan, or revocation time.
A render endpoint should behave like a printer with an API, not like a ticketing platform pretending to be one.
That boundary saves engineering time. It also keeps the integration simple enough for event registration flows, confirmation emails, and last-minute reprints without mixing rendering logic into check-in logic.
Bulk Generation From a CSV Without Writing Code
Spreadsheet-first organizers usually don’t start with an API. They start with a list from Eventbrite, a Mailchimp export, or a hand-cleaned Google Sheet that needs to become hundreds of individualized tickets before the volunteer crew shows up.
The workflow is straightforward. Upload the CSV, map each column to the matching template variable, and let the renderer produce one output per row. In tools built for this job, the finished files are often packaged as a ZIP so the whole batch can be downloaded in one shot.
What the sheet has to get right
The row structure matters more than the file format. Each attendee should have one row, and that row needs the exact values the template expects, including the unique code and whatever field the event uses for numbering or access control. If a name is missing or a code is duplicated, the generator should fail that row before the tickets go out.
Output naming is part of the operational flow too. A pattern such as
{{ticket_type}}-{{code}}.pdf helps staff sort stacks by tier or section
without opening every file. That sounds small, but it’s the kind of detail that
makes printed packets usable at the door.
What bulk generation is really for
Template rendering differs from a marketing design tool. The value isn’t fancy graphics, it’s turning a list into a consistent set of files that match the sales list, the attendee list, or the registration export. The best bulk workflow is the one that keeps data hygiene intact and reduces manual cleanup before the event.
Bulk generation also connects to scale. A separate guide on how to number event tickets covers the numbering pattern itself, while the batch path handles the repeatable file creation. Together, those pieces make it possible to move from a spreadsheet to a zipped set of printable, auditable tickets without scripting.
The trade-off is simple. If the spreadsheet is messy, the output will be messy too. The generator can only protect against bad rows if the source data is clean enough to validate.
Plan Limits and What They Mean for Real Events
The right plan depends on the actual attendee list, not the hope that the event will stay small. A workshop, a conference, and a membership program stress a generator in different ways, especially once batch size and render volume start to matter.
| Plan | Monthly renders | CSV batch size | Delivery options | Custom domain |
|---|---|---|---|---|
| Free | 100 | 25 rows/job | API and hosted link | No |
| Personal | 5,000 | 100 rows/job | API and hosted link | No |
| Studio | 12,000 | 200 rows/job | API and hosted link | No |
| Team | 25,000 | 300 rows/job | API and hosted link | No |
| Business | 100,000 | 400 rows/job | API and hosted link | No |
Those limits come from Zandovi’s pricing page, and the practical read is easy. Small events fit comfortably into the lower plans, while larger conferences or recurring programs need more room for batch jobs and render volume.
What to compare before choosing
The first question is batch size. If the attendee export regularly exceeds the job limit, the team will spend too much time splitting uploads. The second is render volume, especially if the same template is reused for reminders, badges, or updated reprints.
Paid plans also matter for manual workflow speed. On paid tiers, manual editor exports are unlimited, so a designer can keep iterating without burning through the render pool. That separation between automation usage and editor usage is useful for teams that mix one-off design edits with recurring batch jobs.
For many organizers, the safety margin matters more than the headline number. A plan that barely fits a list creates avoidable stress when walk-ins, comped passes, or late additions show up the week of the event.
Best Practices for Print, Validation, and Revoking Links
A ticket that prints cleanly on a laptop screen can still fail once it hits real paper and real lighting. Before anything goes live, the safest move is to test one attendee ticket on paper and scan it under conditions that resemble the entrance, not the design review table.
Treat print settings as part of the ticket
Print-ready output should be exported with embedded fonts and enough resolution for the printer to hold detail in the code and the text. If a print shop is handling the run, the file should also include bleed so trimming doesn’t eat into the artwork. Those settings are boring, but they prevent the most common production mistakes.
Validation belongs in the template before the batch starts. Required fields should fail on empty input, email formats should be checked before delivery, and the QR payload should point at the check-in endpoint with the unique code attached. That makes the ticket useful to the scan system instead of just visually complete.
Treat links as revocable assets
Hosted ticket links should be handled like live URLs, not static files. If a ticket is forwarded to the wrong person or a pass needs to be invalidated, the rendered asset can be revoked with a DELETE action so the old link stops working at the gate. That gives organizers a clean way to rotate access without reissuing every pass.
The operational side matters more as fraud risk grows. In ticketing, digital tickets are exposed to abuse more often than physical ones, and Riskified’s US-market data shows fraud climbs with ticket price, reaching 3.08% for tickets priced at $51-$115 and more than 20% fraudulent orders above $200 (source). INTIX also reports that just over 5% of attempted digital transactions worldwide are fraudulent (source), which is why a QR image alone isn’t enough.
Operational rule: if the ticket can’t be invalidated, the scan code isn’t security, it’s just decoration.
For a separate badge workflow, the same discipline applies to event badges. The file has to be printable, scannable, and easy to revoke if the entry policy changes.
Where a Ticket Renderer Ends and Event Ops Begins
A ticket renderer creates the artifact. It binds variables, generates one file per row or one file per request, and returns a ticket that can be printed, emailed, or handed off to another system. That’s useful, but it’s still only one piece of the event stack.
The rest belongs to tools that run the event itself. Payment processing, attendee CRM, scanner hardware, duplicate-scan logic, and real-time gate validation all sit downstream of the render step. The generator produces the artwork with the unique code, then another system decides whether that code opens a door, marks a sale, or gets revoked.
For developers, the clean next move is to wire the render API into the registration flow and store the returned file URL or blob in the team’s own database. For spreadsheet-first organizers, the cleaner path is to export the finished ZIP and hand it to an existing check-in app, a print shop, or the email vendor already used for attendee communication.
That boundary is the whole point. A ticket generator should make tickets accurate, unique, printable, and easy to batch. It shouldn’t pretend to be the payment platform, the scanner, or the gate system, because those jobs need different tools.
If the next event needs numbered, scannable tickets from a template or a spreadsheet, start by checking whether the current workflow can survive a real attendee list. If it can’t, review the template layout, the batch limits, and the render path, then wire the output into the check-in tool already used on site.