Coupon Template Design and Bulk Generation Guide
- 31 Aug, 2026

A marketer opens a spreadsheet and sees 200 unique coupon codes waiting to ship before Tuesday. The old route is obvious and miserable, duplicate the artwork, paste each code by hand, check every expiry line, then pray the barcode still matches what the cashier will scan. That is exactly where a coupon template earns its keep, because the design stays fixed while the changing fields are bound once and rendered many times.
The difference sounds small until the batch starts drifting. One manual edit changes a discount term in one file but not the other 199, a shared drive fills with near-identical exports, and the first typo at the till costs more than the render job ever did. A real template is not finished artwork. It is a layout with named variable slots, a CSV feeding those slots, and a render pipeline that turns one design into many consistent outputs.
Table of Contents
- Why a Coupon Template Beats 200 Manual Edits
- The Variables That Change Per Coupon
- Real Coupon Designs and the Retail Uses They Fit
- Binding the Spreadsheet and Choosing Print Dimensions
- QR Codes, Expiry, and Delivery Options That Actually Work
- Bulk Generation Through the API and Automation Tools
- Pre-Flight Checklist Before You Render 200 Coupons
Why a Coupon Template Beats 200 Manual Edits
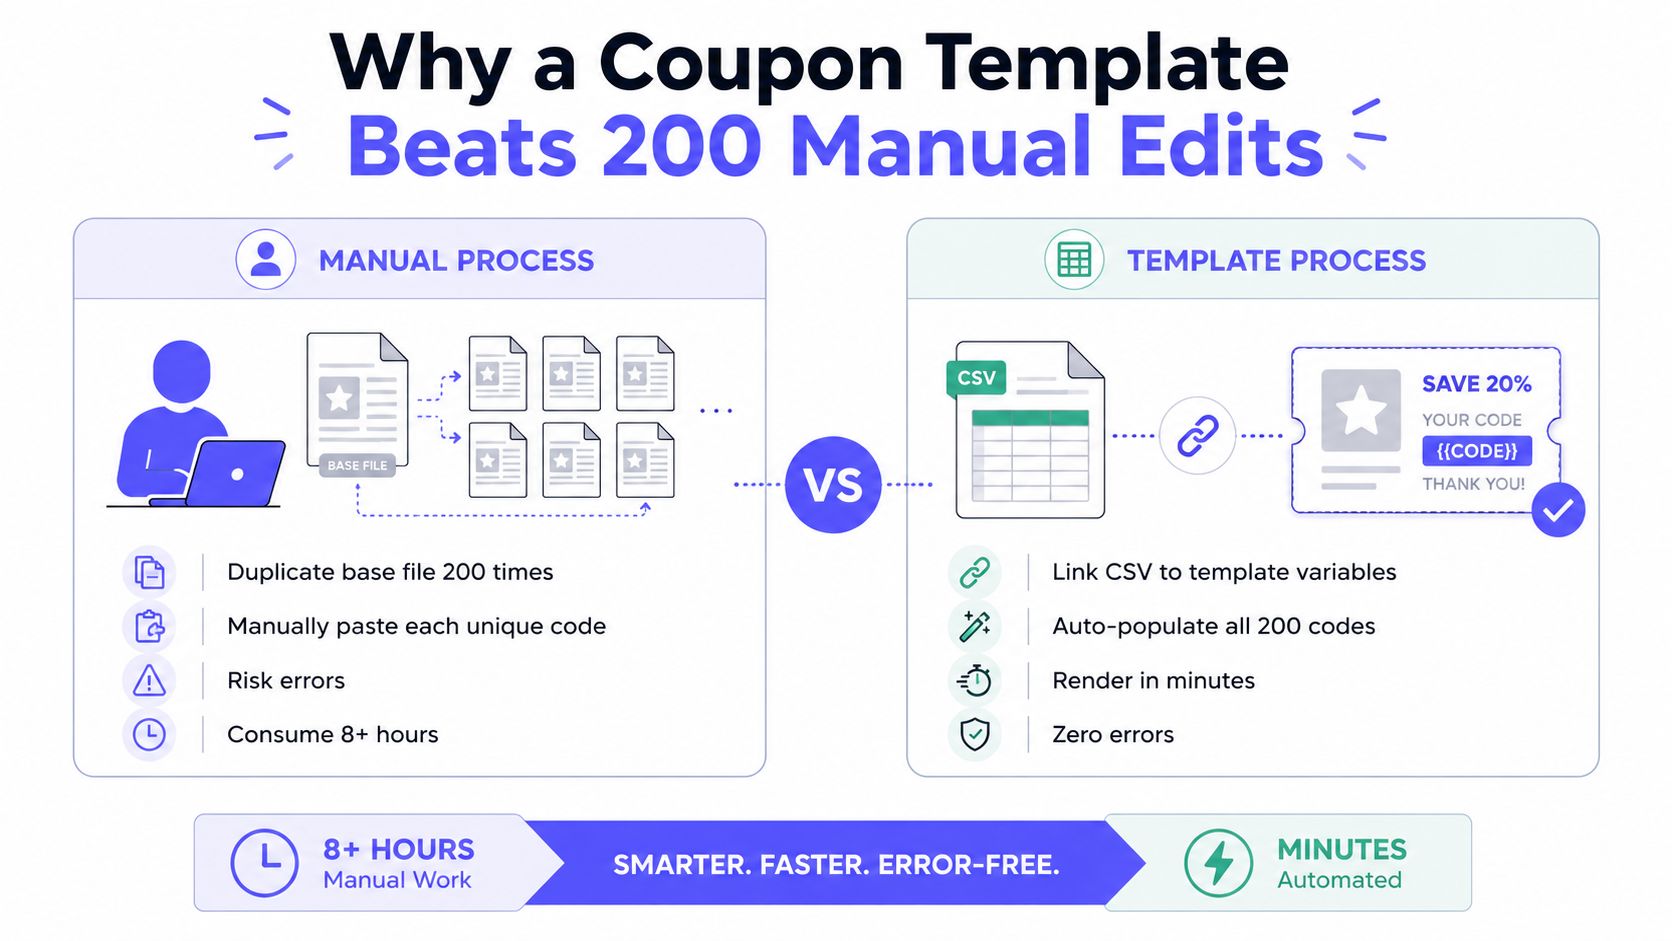
A small-box retailer with a loyalty platform often gets trapped in a familiar mess. The loyalty system hands over 200 one-time codes, someone has to turn them into coupon assets, and the deadline is close enough that shortcuts start looking reasonable. Manual duplication seems faster at first, but it becomes brittle the moment the campaign needs one more edit.
What manual editing really costs
The hidden cost is version drift. If the expiry date changes, the designer has to open 200 files and make the same edit 200 times. If the terms line changes after legal review, some exports get updated and others don’t, especially when multiple people are editing in Drive or desktop folders at once.
Practical rule: if a coupon can be represented as data, it should not be maintained as 200 separate design files.
The better pattern is a single template with bindings for the parts that change, plus a CSV column for each variable. One row becomes one rendered coupon, and the batch job produces the full set in one pass. That is the difference between “saved a file” and “built a system.”
Why binding beats duplication
A bound template keeps the barcode in sync with the human-readable code because both come from the same variable. If the expiry date shifts, the operator edits one field in the spreadsheet, not 200 separate canvases. That means fewer mismatches, fewer re-exports, and fewer “which version is current” mistakes.
For teams that need a starting point, the template library at Zandovi templates follows this exact model, design once and render many. The workflow is the same whether the output is a printable insert, a digital coupon, or a scan-at-register voucher.
The Variables That Change Per Coupon
A coupon design only works at scale when the moving parts are clearly separated from the fixed layout. The logo position, brand colors, legal footer, bleed marks, and overall composition stay locked. The data layer changes per coupon, and it needs to be treated like structured input, not freeform text pasted into a canvas.
Core fields and how they bind
The code is the most obvious variable, usually bound as {{code}}. It
should be required, unique, and validated before rendering starts, because
duplicate codes create reconciliation problems later. The discount or value
field, often written as {{discount}}, should stay numeric so the renderer
doesn’t choke on stray symbols or inconsistent formatting.
The expiry date should bind as {{expiry}}, ideally in ISO format so it
sorts cleanly in the CSV and displays consistently in the artwork. The terms
line, such as {{terms}}, is where teams get sloppy. It needs control, not
improvisation, because one coupon saying “full-price items only” and another
saying “select styles only” will confuse cashiers and support staff if they’re
mixed inside the same batch.
A controlled terms list is safer than open text when the same promotion will be redeemed by staff who need to interpret it quickly at the till.
A serial or batch ID is often optional, but it helps with reconciliation when finance or support has to trace a problem back to a specific run. In practice, the template should reject null codes and null expiry dates before the job writes any files, then let optional fields stay blank only where the design supports that.
| Common coupon variables and validation rules | Example value | Type | Validation rule |
|---|---|---|---|
| Variable | {{code}} | Required text | Must be unique and non-empty |
| Discount | {{discount}} | Number | Numeric only, no currency symbol in the field |
| Expiry | {{expiry}} | Date | ISO date format, non-empty if the design shows expiry |
| Terms | {{terms}} | Controlled text | Must match approved copy, not ad hoc wording |
| Batch ID | {{batch_id}} | Optional text | Should be consistent within the run |
Real Coupon Designs and the Retail Uses They Fit
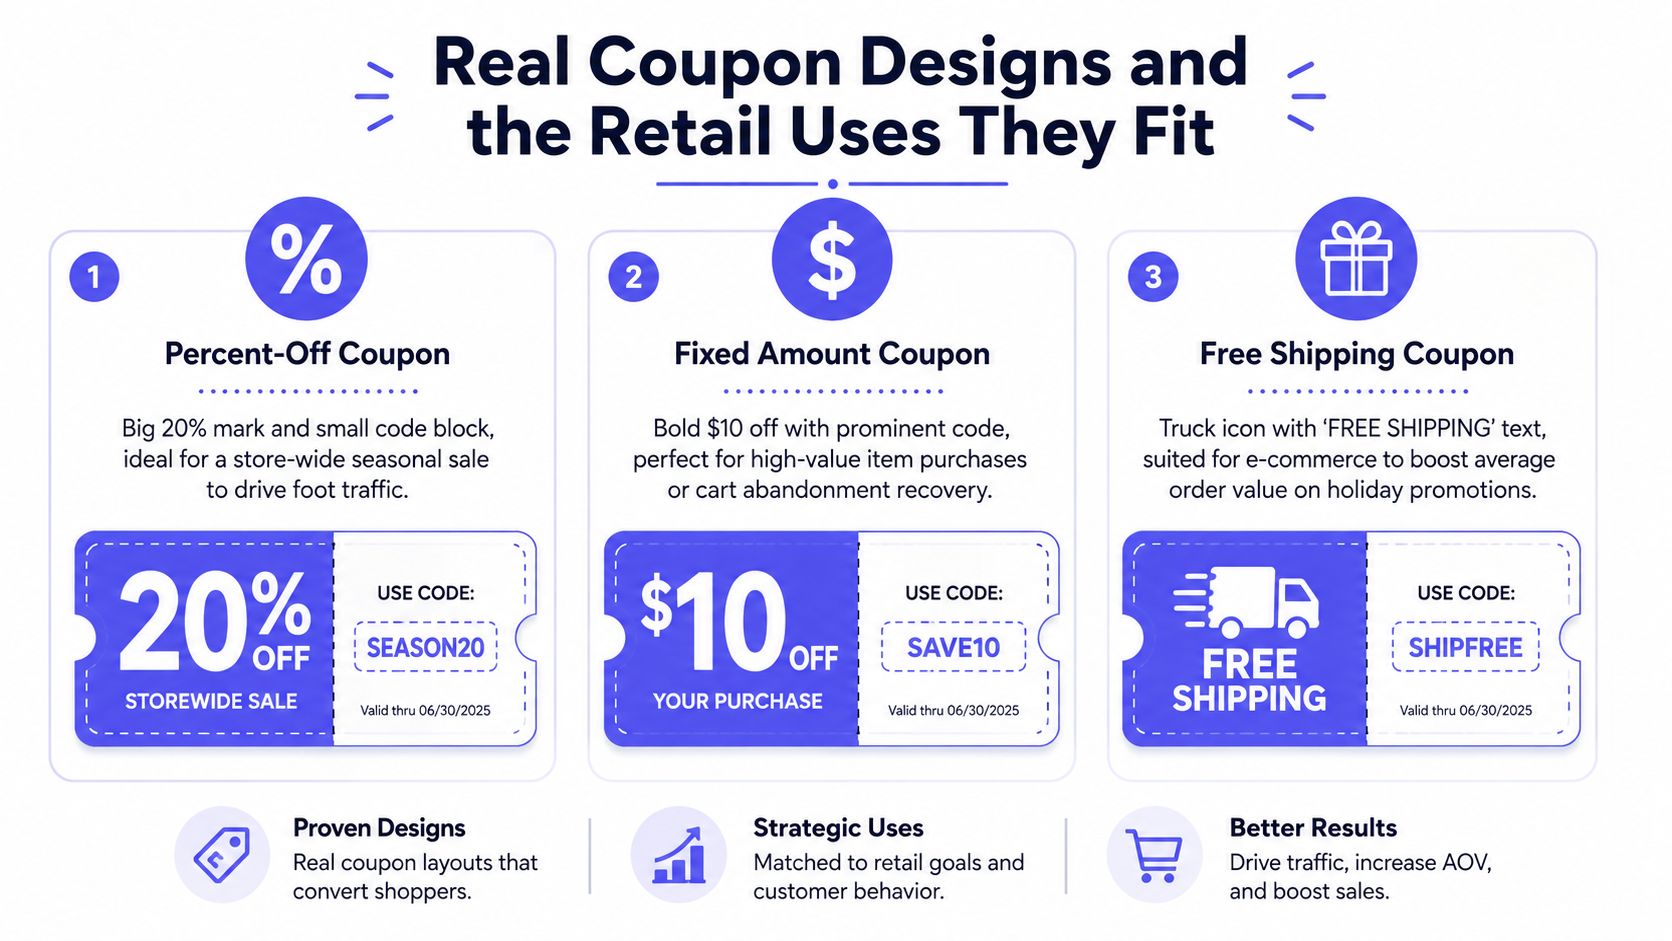
A strong template gallery saves time because it already matches the job. The blank-canvas problem is real, and it wastes more time than many companies admit. Picking a design whose variable slots already match the CSV column names is faster than rebuilding a layout for each campaign.
Designs that map cleanly to retail jobs
A percent-off coupon fits a fashion retailer running a seasonal sale. The
visual usually centers the percentage mark, then keeps the code block smaller so
the discount reads first. In that layout, the variables are {{code}},
{{discount}}, {{expiry}}, and {{terms}}, with {{recipient_name}} added
only when the campaign needs personalized email delivery.
A fixed amount coupon works better for hospitality or higher-ticket retail where the shopper needs a simple dollar value instead of a percentage calculation. The same variable logic applies, but the copy stays cleaner when the amount is presented as a value field and the terms line explains what the offer covers. That pattern is also easier to scan on a receipt-style insert.
A free shipping coupon is the most natural fit for ecommerce promotions, especially when the code is being reused across email and social. The code must still be bound, but the main visual cue is the shipping offer itself. For that reason, the gallery at the ecommerce coupon template section is useful when the campaign is more about cart completion than in-store redemption.
Print-first versus digital-first layouts
Print-first coupon designs need bleed, safe zones, and a composition that survives trimming. Digital-first versions usually care more about square or mobile-friendly framing, with transparent PNG export often making handoff easier for email or social placements. The best template is the one that already fits the channel, not the one that looks nicest in a browser preview.
Binding the Spreadsheet and Choosing Print Dimensions
The cleanest workflow starts in a spreadsheet, not in the editor. Each row becomes one coupon, and each column maps to a variable name that the template already expects. Once the column headers match the bindings, the render job can be run row by row without hand-editing each asset.
The CSV-to-render pipeline
The safest sequence is simple. Prepare the CSV or XLSX file with one row per coupon and one field per variable, upload it to the bulk render tool, map the sheet columns to the template fields, and dry-run the first few rows before committing the full batch. That first check catches missing codes, malformed dates, and empty QR or barcode fields before the job wastes time.
For press work, the common formats are 3.5 x 2 inch wallet cards, 4 x 6 inch postcard inserts, and A5 tear-off flyers. A commercial printer usually wants 300 DPI and CMYK, while in-house proofs can be checked at a lower resolution before final export. Full-bleed designs need 3 mm bleed, plus crop marks, and the variable text must sit inside safe zones so trimming doesn’t clip the code or expiry line.
Press files fail most often because the template looked fine at screen size but pushed the code too close to the edge.
| Coupon print dimensions and export settings | Dimensions (in) | DPI | Color | Export Profile |
|---|---|---|---|---|
| Wallet card | 3.5 x 2 | 300 | CMYK | PDF/X-1a |
| Postcard insert | 4 x 6 | 300 | CMYK | PDF/X-3 |
| Tear-off flyer | A5 | 300 | CMYK | PDF/X-1a |
| Proof export | any approved trim | 150 minimum | RGB or CMYK depending on proof | Plain PDF |
The practical payoff is simple. The same bound design can render to a single-page PDF, a PNG for digital handoff, or a ZIP of many outputs without rebuilding the artwork each time. That keeps the design contract stable while the delivery format changes.
QR Codes, Expiry, and Delivery Options That Actually Work
A barcode and a QR code solve different problems, even when they both point to the same bound code. A Code 128 or Code 39 barcode is the safer fit when the coupon is scanned at a point-of-sale terminal, because 1D symbols are what most tills and laser scanners are already built to read. A QR code is better when the coupon is shown on a phone screen, opened from email, or needs to point to a redemption URL that can be tracked.
Symbol choice and scan behavior
QR error correction should stay at M for clean layouts, then move to Q when the code sits on a busy background or gets resized more aggressively. The important thing is not the symbol type alone, but whether the design keeps enough quiet space around it for reliable scanning. A beautiful coupon that won’t scan is just a complaint waiting to happen.
Expiry and retention choices
Expiry should be visible in the design and enforced in the system that serves the coupon, especially when the code is redeemed through a hosted link. Some workflows keep the file available for a short retention window after expiry so customer support can settle disputes, then purge it automatically. That is a better operational trade-off than leaving stale offers floating around indefinitely.
Delivery should match the job. Raw bytes make sense when the caller will archive the PDF immediately. A signed hosted URL makes more sense when the coupon is being emailed or sent by SMS, because the attachment does not have to pass through mail infrastructure and the link can expire on schedule.
Bulk Generation Through the API and Automation Tools
A real bulk workflow is a request, a job, and a download. For a single coupon render, the caller posts the template ID, a variables object, and the output format to the render endpoint, then receives either the PDF bytes or a signed URL. For a batch, the caller posts the template ID plus the CSV upload, receives a job ID, polls the status endpoint until complete, then downloads the ZIP of all rendered files.
How automation tools should pass the job
n8n, Make, and Zapier all follow the same pattern even though the wiring looks different. Set the HTTP Request node to POST, send the body as form-data, attach the CSV as a file field, and pass the template binding as a JSON field. Once the response comes back, parse the job payload, then pipe the download URL into the next step for email delivery or cloud storage.
The useful part of that setup is that the automation tool never has to understand the artwork. It only moves data, waits for the render, and hands the output to the next module. That keeps the coupon system deterministic and lets the spreadsheet stay the source of truth.
For teams comparing render APIs, Zandovi’s API comparison page is one way to inspect the public differences without assuming feature parity. The key point stays the same regardless of vendor, the batch job should accept structured rows and return a predictable download artifact.
A working batch flow
A marketer drops a 200-row CSV into a Make scenario, the HTTP module posts it, the response returns a ZIP URL, and a Gmail module sends the right coupon PDF to each row’s address. No manual duplication, no separate file naming, no last-minute code swapping.
Pre-Flight Checklist Before You Render 200 Coupons
A batch should not start until the bindings, the file, and the delivery path all agree. The fastest failures are usually invisible until render time, so a pre-flight pass is cheaper than fixing 200 broken outputs after the fact.
Final checks that prevent waste
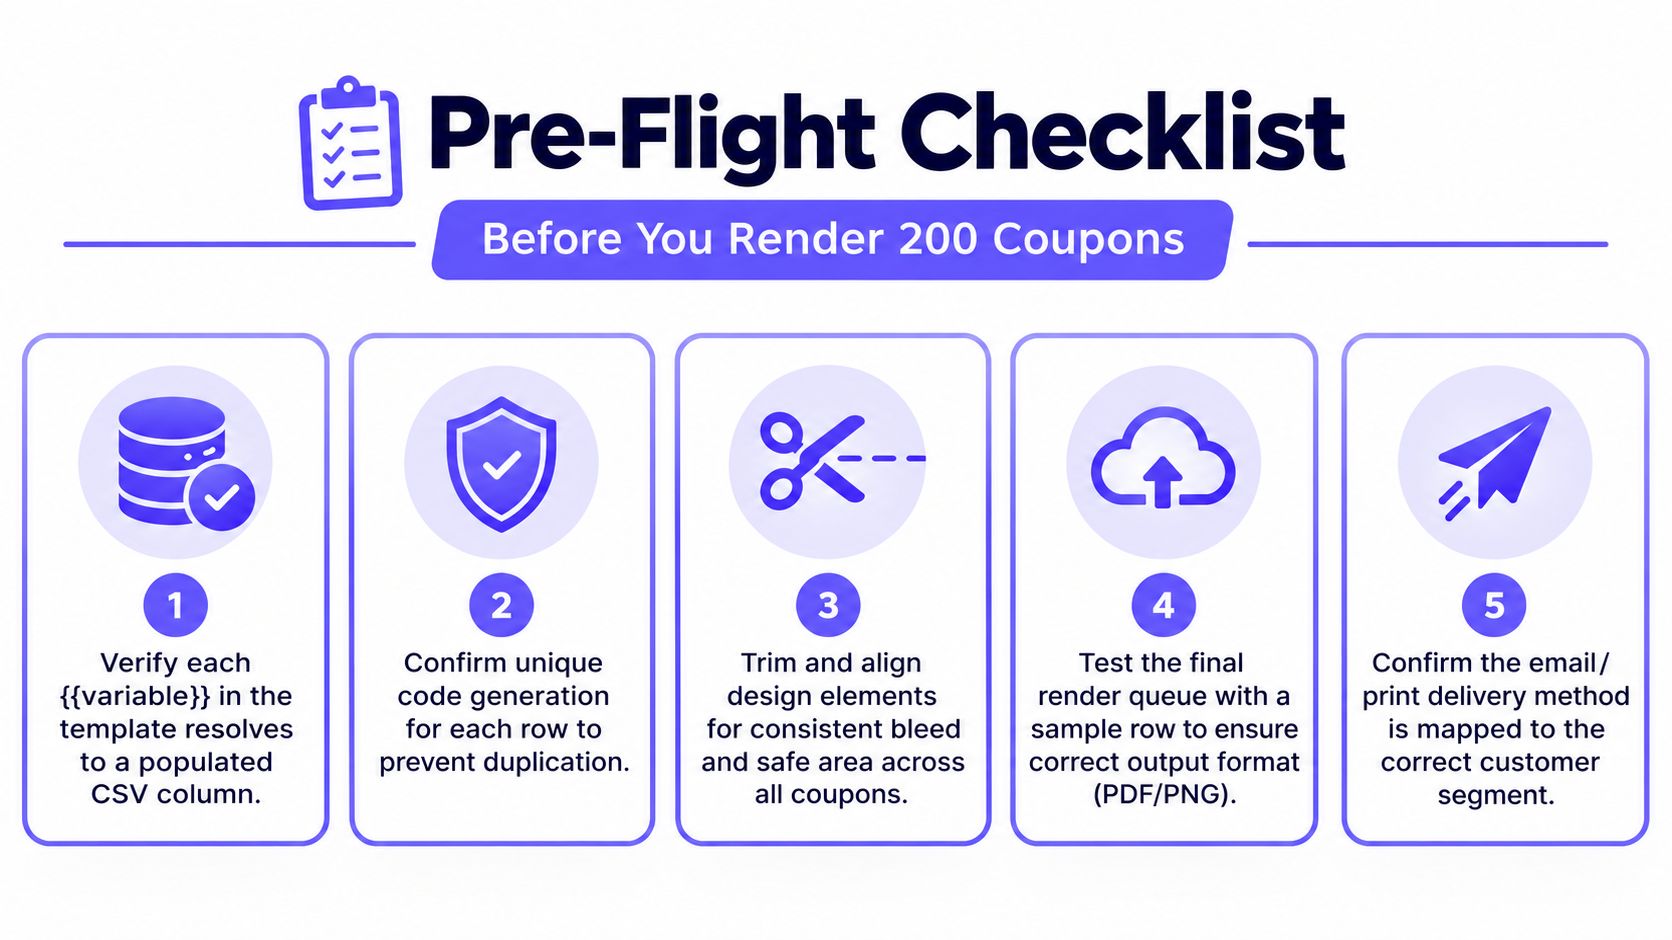
- Populate every variable: Each
{{variable}}should resolve to a real CSV column, with no nulls in the code or expiry fields. - Confirm uniqueness: Duplicate code rows should fail before any PDF is written.
- Check trim safety: The code, discount, and expiry must stay inside the safe area for the chosen print size.
- Test one sample row: A dry run should prove that PDF or PNG output looks right before the full queue starts.
- Match delivery to audience: Email and print workflows should map to the correct segment, with hosted URLs or raw bytes chosen intentionally.
The rendering rule is straightforward. 300 DPI and CMYK belong to press work, while 150 DPI minimum and on-screen color spaces are fine for proofs. If the coupon includes a barcode or QR code, that field can’t be empty, and the final file count should match the expected row count before the job is considered done.
For redemption-specific design thinking, the gift-card workflow guide at Zandovi’s gift-card design article uses the same logic around scan-to-redeem fields, codes, and clear instructions.
A coupon template should behave like a bound-variable system, not a folder full of hand-edited images. Teams that keep the layout fixed, validate the CSV early, and bind the code to the barcode end up with fewer errors and faster fulfillment. If the next campaign already has its rows in a spreadsheet, the practical move is to map the variables, run a three-row test, then render the full batch and ship the coupon flow before the deadline tightens.